Yes... those are my very own homemade baguettes!!! I can't tell you how proud (and kind of shocked) I am. There were a few moments there when I thought they weren't going to make it... but they did, and they are delicious!
It was one of my New Year's cooking resolutions to learn to bake bread. So, I bought an oven stone, a giant bag of King Arthur flour, yeast, I printed numerous instructions, and spent the weekend making bread. ...Yes, the entire weekend.
This all started on Friday when I told A. that we'd be having deliciously crusty baguettes, hot out of the oven, for breakfast the next morning. ...Well, it didn't go as planned. Turns out making a baguette is complicated baking... there's so many different methods out there. But, by Sunday night at around 11 pm - after 5 lbs of flour, 3 recipes, and 6 loafs later: I had the perfect baguette! It was probably the most delicious baguette I've had (...second is Balthazar's of course) mostly because I put so much work into it. :-)
After a few attempts at different instructions, I finally found the perfect recipe from King Arthur Flour. If you've never made bread, I very much recommend you give it a try. Just have a little patience with the process... you will be well rewarded at the end. There's nothing more delicious than warm bread out of the oven. Hope this helps!
BAGUETTES (from King Arthur.com)
For the starter:
1/2 cup cool water
1 cup unbleached all-purpose flour
1/16 teaspoon instant yeast
For the Dough:
1 teaspoon active dry yeast
1 cup lukewarm water
3 1/2 cups unbleached all-purpose flour
1 1/2 teaspoons salt
1. Make the starter. Mix all the starter ingredients and let it sit (in a covered bowl) overnight (or 14 hours). You'll be amazed with what you see the next day. The starter will be completely bubbled the next day...imagine the appearance of a pancake that is heating up.
2. Make the dough. Using the starter mixture you start to build the dough by adding the yeast (if you are not using instant yeast you will want to add the yeast to the water first and allow it to dissolve), water, flour and salt and kneading until the mixture is somewhat smooth, cohesive dough. This is the perfect project for the dough hook attachment on a stand mixer.
Oil a large bowl, and place the dough inside and cover with plastic wrap. You are going to let the dough rise for a total of 3 hours. Every hour you will 'punch' the dough down (don't literally punch it...rather deflate it) and let it rise again. Repeat.
3. Work the dough. Place the dough on a floured surface, divide in 3 equal parts. Cover the dough with plastic wrap and let it sit for 20 minutes. Now you're ready to start forming the baguette! You will take each piece, and fold it over itself, flatten it slightly, and press the edges to seal. This will extend the dough into a log shape. Repeat twice until the baguette is about 15" long. Place the finished log on a heavily floured towel or cheese cloth. Repeat with the other 2 pieces of dough.
4. Rise again. Cover the loaves with greased plastic wrap and allow the to rise for another 90 minutes.
5. Bake. Preheat the oven to 450F. Roll the floured loafs onto an oven stone or lightly greased baking sheet. With a pairing knife, make 3 angled slits on the top of the loafs (if you see air pockets in the inside of the dough....perfect!). Spritz each baguette with plenty of water (this will create the crunchy crust). Bake for 25 minutes.
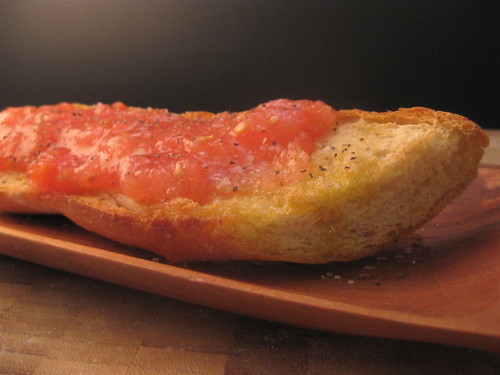
6. Enjoy!!! I must have eaten one whole baguette with a bit of butter and kosher salt right when it came out of the oven. The next day, I sliced one in half and made Pan con Tomate by toasting the slices, rubbing them lightly with a clove of garlic, and topping with chopped tomato, salt & pepper, and plenty of olive oil. Delicious!


4 comments:
Beautiful! Those baguettes look like they came from an experienced bread baker!
Thank you Pam! :-)
That bread looks delicious! Once you start baking your own, it's really really hard to go back to store bought. It just doesn't taste quite the same after you've had it piping hot from your own oven. Check out the book Artisan Bread in Five Minutes a Day. It totally turned my bread-making-world upside down!
P.S. Only thing better than homemade bread is homemade bread slathered in Pamplie butter with fleur de sel. Apologies in advance for what this piece of information will do to your jean size.
Oh my! ...french butter w/fleur de sel? amazing! I think I'm going to regret ever knowing about Pamplie :-)
I've been curious about the Artisan bread book, glad to hear you liked it! I really want to start making my own bread.
Post a Comment