Friday, October 30, 2009

Happy Friday :: The Botany of Desire


Happy Friday!  What are you doing this weekend?  A. and I stayed in tonight and watched the thought provoking PBS documentary "Botany of Desire".  Amazing!   It's based on Micheal Pollan's book -  which I have not read but is next on my 'to read' list.  You're view of food will never be the same.  I highly recommend the show.  We ordered the most delicious pork enchilladas from Mexicana Mama, and watched tv... what a perfect friday night! :-)


Oh, I'm also getting ready for a full-fledged morning of baking tomorrow: Happy Halloween!  I can't wait.  I have all new cookie cutters, so a few spooky posts to follow tomorrow morning.  :-)

Tuesday, October 27, 2009

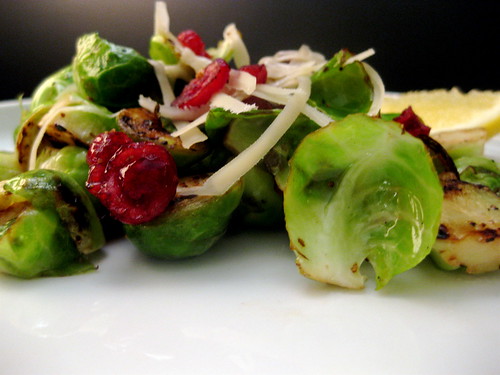
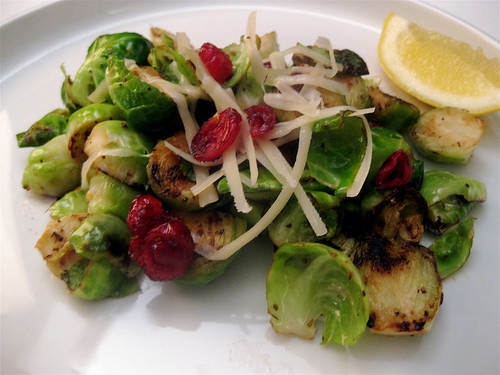
Warm Salad :: Toasted Brussels Sprouts w/Cranberries


I ♥ brussels sprouts!  They're a little bitter, perfectly crunchy, and go well with mostly anything.  I didn't start enjoying them until a couple of years ago,  so I must be making up for lost time, because I can't get enough of them now.   Raw and shredded, sauteed, or roasted; pretty much anyway you serve them... but  I especially enjoy them in the Fall as a side to anything roasted.  

Tonight, I sauteed them and topped with plenty of cranberries, a bit of Parmesan and seasoned it all with a garlic olive oil and lemon juice.   A quick weeknight warm salad!  It was delicious!

...Wouldn't this be a perfect side for Thanksgiving? 
Enjoy!

TOASTED BRUSSELS SPROUTS w/CRANBERRIES
2 cups Brussels Sprouts (1 small box), halved
Handful of Dried Cranberries (or fresh! but add a bit of honey)
Juice of half a lemon
Olive Oil
Salt & Pepper
2 cloves of garlic, peeled
Grated Parmesan

In a large skillet over medium-high heat, heat the olive oil and garlic cloves.  When the garlic starts to brown, add the brussels sprouts.  Mix with the oil and garlic cloves until the brussels sprouts are covered in olive oil.  Continue to saute until the sprouts start to brown.  Add the cranberries, lemon juice, and salt and pepper to taste.  When the brussels sprouts are crispy, remove from heat.  Top with grated Parmesan and serve.


Thursday, October 22, 2009

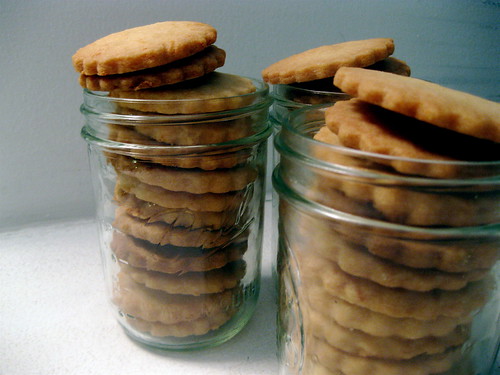
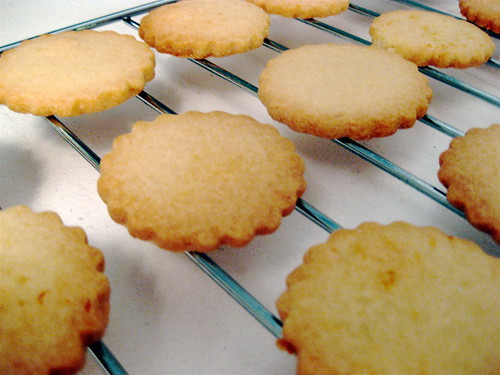
Cookie Jars :: Lemon Zest Shortbread


Last night, with way too many things on my to-do list, I decided to not do any of them and instead: bake cookies! So much more fun. Well, I rationalized it with the fact that the holidays less than 2 months away so it's really time to start picking/testing cookie recipes. :-)

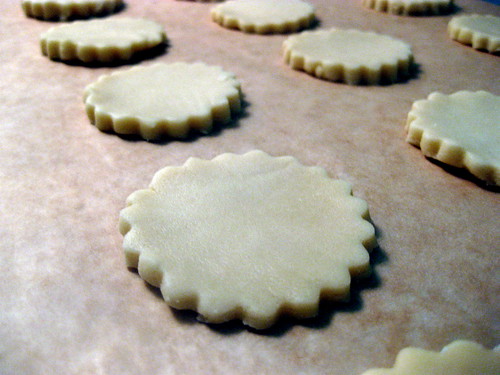
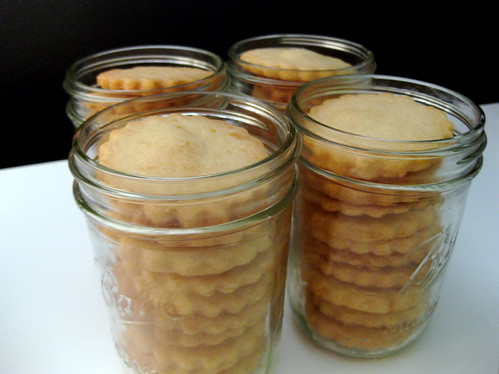
The truth was that I had bought a new cookie cutter in the morning and could not wait to try it. Especially when I realized that the size fit perfectly into my glass jars! (...yes, I know, I am obsessed with these) But how cute are these glass jars filled with cookies? I wanted a cookie that would keep well for a few days, so I came up with Lemon Zest Shortbread cookie jars. A few jars for us, and a few to share.

Shortbread is the most basic cookie recipe: flour, butter, sugar, and a bit of vanilla. That's it! It's a Scottish tradition, dating back to the 12h century. It's name coming The traditional recipe is 3 parts flour, 1 part sugar, and basically for every cup of flour, 1 stick of butter. This is all about the ingredients, so you need to use good quality butter and pure vanilla extract. When researching shortbreads I found out that butter has a rating system (who knew!). Look on the box and look for a "AA" rating. As for vanilla, I *heart* Nielsen-Massey Madagascar Vanilla.

I think it's the perfect holiday cookie... Picture a snowy holiday morning, staring out the window, with a big cup of tea and little shortbread cookies.

PS: I'll warn you... there are alot of pictures of cookies coming up! Sorry, but what better way to start the weekend than cookies? :-)

Enjoy! Happy Friday.


LEMON ZEST SHORTBREAD COOKIES
3 cups of all-purpose flour
1 cup fine sugar (or powdered sugar)
3 sticks unsalted butter
1 teaspoon of vanilla (pure, not vanilla extract)
1/4 teaspoon of salt
*Optional: Zest of 2 lemons

Preheat the oven to 350F. Combine the butter and sugar with a hand blender until creamy. In a separate bowl mix the flour and salt. Add the flour and salt to the butter and eggs, along with the vanilla and lemon zest. Continue to mix with a hand blender until the dough has started to come together.

Place the dough on a light floured surface. With your hands shape the dough into a large disk. Wrap the dough in plastic wrap and chill for 30 minutes.

Roll the dough to 1/4" thick and cut your cookies. You can use a cookie cutter, or use a pairing knife and a ruler and make straight cuts along the dough to get rectangular cookies. To bake, place on top of parchment paper or on a lightly buttered and greased cookie sheet, and into the oven for 20 minutes or until the edges start to brown. (At this point - you could also freeze the dough).


Remove the cookies from the baking sheet and allow them to cool on a rack. I don't own a cookie rack, so I use the rack from my microwave oven. It does the trick!


When the cookies are at room temperature, store them in air tight containers. They will keep for over a week.


Enjoy with a cup of coffee or tea for dunking. :-)


Tuesday, October 20, 2009

Bread & Butter :: Cinnamon Honey Butter


Isn't butter just perfect?  It's almost as perfect as bread!  ...I think if I had to pick only one food to eat for the rest of my life it would have to be bread with butter.  Well, that's technically two foods, but who's counting? :-) It's just one of those simple, uncomplicated, comforting flavor combinations that you can't help but love.  

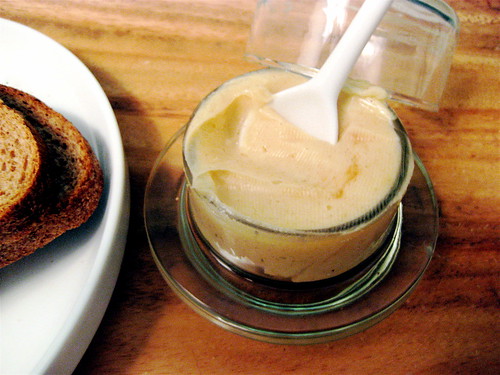
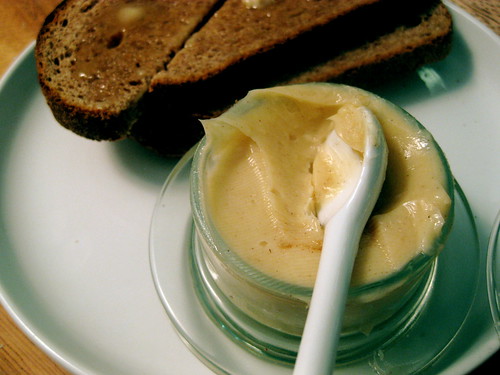
So last night, when I saw Barefoot Contessa (ahh...the wonders of Tivo!) make a cinnamon honey butter, I had to try it.  On my way home tonight, I picked up a fresh loaf of whole wheat bread and whipped up a batch.  Butter, honey, and cinnamon, and I also added a bit of brown sugar for extra sweetness.

This is perfect to have in the fridge for an indulgent breakfast over toast, an english muffin, ...or imagine on pancakes! Yum!  But also perfect in a dessert:  slather a bit of the butter on apple slices and broil them in the oven until they start to brown.  Delicious by themselves or atop ice cream.

...I think this is going to be the start of a flavored butter obsession :-) 
Enjoy!


CINNAMON HONEY BUTTER (adapted from Barefoot Contessa)
1 stick unsalted butter, at room temperature
3 tablespoons clover honey
1/4 teaspoon teaspoon cinnamon
1/2 teaspoon brown sugar
1/8 teaspoon kosher salt

Mix all ingredients with a hand blender or a food processor until well mixed.  Store in an airtight container on the fridge. 
Enjoy!


Monday, October 19, 2009

Dreaming of France :: Boeuf Bourguinon


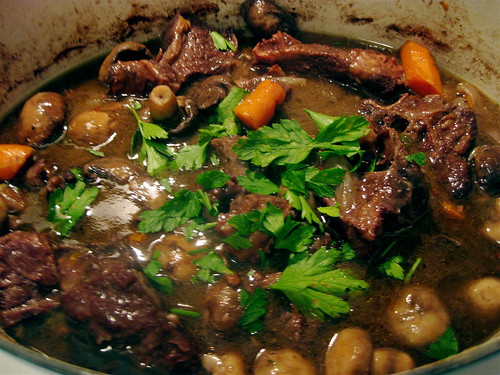
So with the apartment already smelling like bacon, and a brand new dutch oven what else could I make for dinner but Beouf Bourguinon of course!  This is one of my favorite dishes.  I first had it in Paris at a tiny restaurant on Ile St Louis.  Days after we came back from our trip we were already craving it, and had to set out to recreate it.  I've been in love ever since. 

It's one of those wonderful dishes that stews for hours, and the meat becomes perfectly tender.  It originated as a peasant dish in Burgundy using wine as a way to tenderize the meat, and eventually became a standard in french cuisine when it was adapted by Escoffier.    In France, they recommend you make it a day beforehand and let the flavors continue to develop.  Up to you... but I'll warn you, it's hard to resist having a plate as soon as it comes out of the oven. :-)

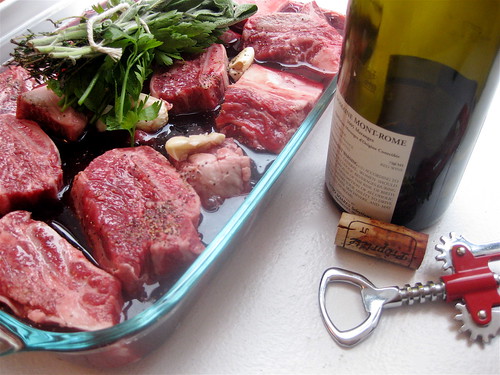
So A. and I took a trip to Ottomanelli's in search of meat!  Traditionally this is made with chunk steak, but I decided to try short ribs.   You can try variations and decide which you like best, I love the 'melt in your mouth' texture of short ribs.  The first time I made this dish, I made it in a 3 quart dutch oven and it was perfect for 2 with leftovers for the next day.  But with friends coming over, I made double the portion in a 6.5 quart pot.  It's the same effort to make more... so if you have a large enough pot, why not?  The leftover actually freeze very well.

Enjoy!


BOEUF BOURGUINON (adapted from The Food of France) serves 8
4 lbs Short Ribs (or chunk steak), cut into 1.5" cubes
1 bottle (750ML) Red Wine, preferably Burgundy
1 1/2 cups good quality beef stock
5 garlic cloves
Bouquet Garni (sprigs of thyme, parsley, bay leaves tied together with twine)
1/2 stick of butter
2 onions, chopped
4 carrots, chopped
3 tablespoons All Purpose Flour
8 oz Bacon, chopped
3 Shallots, peeled but left whole
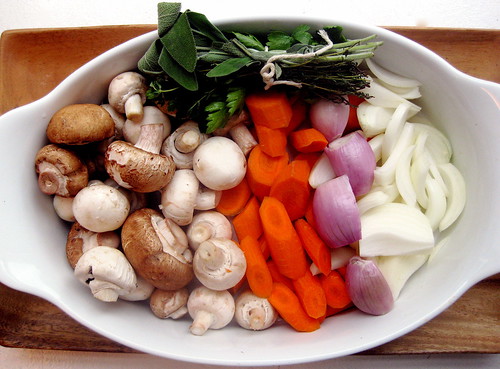
3 cups mushrooms (I used a mix of crimini and white mushrooms)

Place the meat, wine, garlic, and bouquet garni in a large bowl and leave in the fridge for at least 3 hours, preferably overnight (especially if using chunk meat).


Preheat the oven to 315F.  Drain the meat, and reserve the marinade and bouquet.  Pat the meat dry with a paper towel.

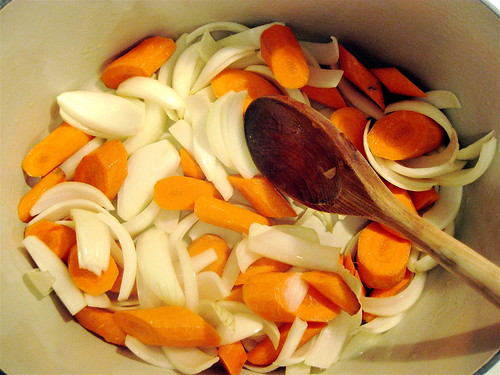
In the casserole, or dutch oven, add 1 oz of butter over medium heat.  Add the onions, shallots, carrots, and bouquet garni stirring occasionally.  Cook for 10 minutes.  Remove from heat.


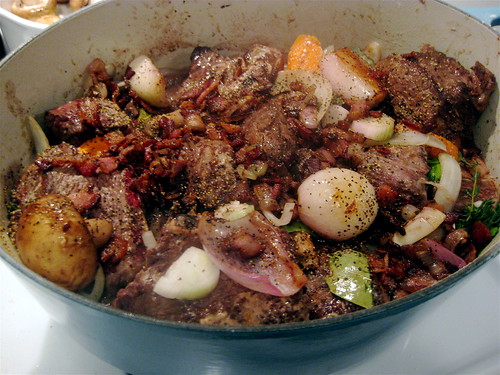
In a separate large non-stick skillet, over high heat,  add  1 oz of butter and the bacon.  When the bacon starts to crisp, remove it from the pan but keep the bacon fat.  Reserve the bacon pieces.  Sear the pieces of meat in batches in the butter and bacon fat, adding to the casserole/oven dish when fully browned.  Pour the wine marinade and beef stock into the skillet when you are done browning the meat to deglaze the pan.  Allow the marinade to boil for at least 30 seconds and remove from heat.

Reheat the casserole/oven dish to high heat and sprinkle the meat and vegetables with the floor.  Stir to make sure all pieces are evenly coated with the flour.  Add the bacon pieces, and pour in the marinade and stir well.  Bring to a boil.  Place the dish covered in the oven for 2 hours.


When the casserole is ready remove form the oven and  in a non-stick skillet, add the remaining butter and brown the mushrooms over high heat.  Add the mushrooms to the casserole and stir.  

Remove the bouquet garni, skim any fat from the surface, and add fresh parsley as a garnish.  Serve with crusty bread or a pile of mashed potatoes.


...and voila, c'est tout!  Bon appetit!

Sunday, October 18, 2009

For Starters :: Seared Local Scallops with Fresh Herb Aoli


After a delicious brunch... onto dinner! :-)  

We hadn't seen our friend's L. & D. in a while, and a friend of A.'s just moved to NYC.  So we invited them all over for dinner.  Aren't cold fall nights perfect for just staying in with friends and chatting for hours and hours over cheeses and wine, and a big dinner?  I think so... I wish we had a long farmhouse style rustic table and could have all of our friends over every Saturday until the weather warms up again.  Wouldn't that be wonderfully fun??? :-)

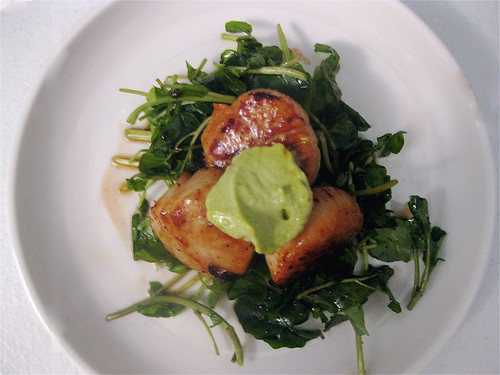
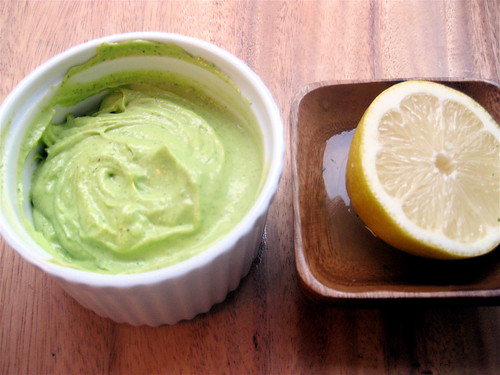
On the menu for dinner... first: the appetizer.  We had 2 pounds of local wild sea scallops and thought they'd make the perfect appetizer seared and served atop a bed of watercress.  For extra flavor, I made an aoli of basil and parsley... delicious!!!  

I have to say that making an aoli (or mayo!) is a pretty interesting process.  It's amazing how the slow streaming oil creams the egg yolks into a perfect custard.  It was my first time attempting this, and it was much easier than I imagined, and delicious atop fish or even as a dip for fresh veggies.  I think I must have called A. over about 10 times as I was processing the ingredients to show him the texture change... it's almost like magic! :-)

This recipe serves 6, but you can easily decrease it for a quick weeknight dinner for 2 or even one.  The herb aoli can be made a day beforehand and the scallops only take about 5 minutes to cook.   Enjoy!


SEARED SCALLOPS w/FRESH HERB AOLI (serves 6)
2 lbs Scallops (about 3 scallops/person)
Olive oil
1/2 tablespoon Herbes de Provence
Juice of 1 lemon
Salt & Pepper to taste
Slice of Bacon or Pancetta
Fresh Herb Aoli (recipe below)
Watercress Lettuce, or Frisee

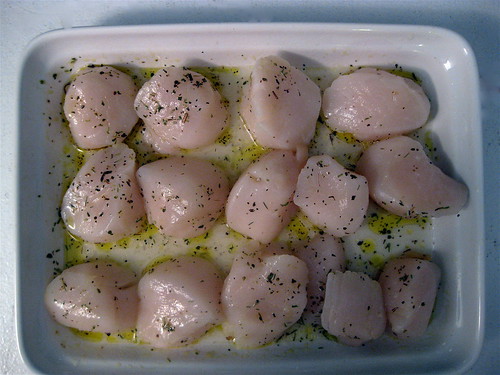
Marinate the scallops with olive oil (about 3 tablespoons), lemon juice, herbs, and salt for 30 minutes in the fridge.


Heat a large non-stick skillet over high heat and add a bit of olive oil and the bacon.  Allow the bacon to cook and release its fat.  When the bacon starts to crisp, remove the strip from the pan and carefully add the scallops (which have been patted dry with a paper towel).  

Do not overcrowd the pan or the scallops will not sear, leave about 1" between each scallop.  You can do the searing in batches, but you don't want to do more than 2 batches since scallops should be served immediately after searing. Cook the scallops 2 minutes on each side until they get a light brown crust and are cooked in the middle.  If cut down the middle, you will see about 1/4" crust and a translucent center.

Plate the scallops atop a bunch of watercress (tossed with a bit of olive oil, salt and pepper) and add a dollop of the fresh herb aoli.

FRESH HERB AOLI
4 egg yolks
3 cloves garlic
1 tablespoon lemon juice
1 tablespoon basil
3 tablespoon parsley
3/4 cup olive oil

Add the eggs, lemon juice, and herbs to a food processor.  Pulse until the mixture becomes creamy and the herbs are finely chopped.  With the food processor on, add the olive oil a 1/4 teaspoon at a time until the mixture starts to thicken.  Slowly start to stream the olive oil into the processor.  


* My mini prep food processor does not have the option to add to it while it is turned on, so after chopping the eggs, lemon and herbs, I put the mixture in a bowl, and added the olive oil while mixing with an immersion blender... it worked just fine!  Just remember to add the oil slowly.

Saturday, October 17, 2009

Saturday Brunch :: Eggs en Cocotte & Roasted Sweet Potatoes


Hope you are enjoying the weekend!  I am getting ready for a busy day!  We are having friends over for both brunch and for dinner. Yes, twice in one day!  I can't wait... it's freezing here in NYC (40's in October!) so I can't imagine anything better than staying in and cooking.  :-)

So first: breakfast!

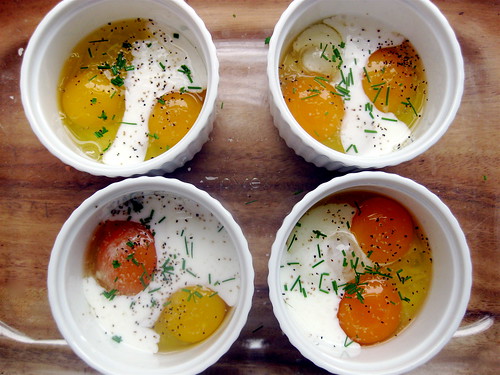
Our friend E. has her wonderful friend Simon visiting from London.  They stopped by for brunch on their way to the MOMA this morning.  With 3 dozen farm fresh eggs from our CSA last week, I decided to make Eggs 'en cocotte'.  This is a classic french dish where eggs are baked individually in ramekins in a 'bain marie'  in the oven until the white is no longer runny.  You can top them with cheese or veggies (whatever you think of!) and serve with toast for dipping.  I paired it with sweet and savoury rosemary roasted sweet potatoes.   What a yummy way to start the weekend... with friends and plenty of food!

Ok, so on the BRUNCH MENU:
- English Breakfast Tea (of course!)
- Scones with clotted cream and strawberry jam (I ♥ freezing scones... fresh scones whenever you crave them!)
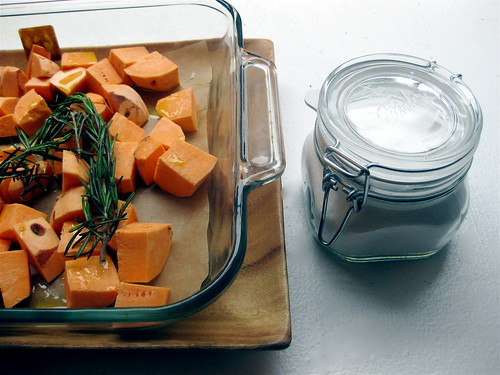
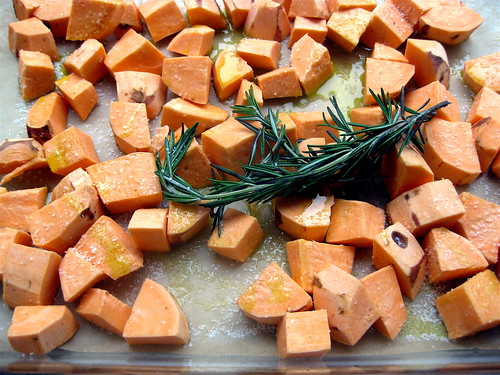
- Roasted Rosemary Sweet Potatoes
- Eggs 'en cocotte' with whole wheat bread toast
- Plenty of crispy Bacon

Oh ps:  I was, of course, very embarrassed to serve Simon my scones , but A. finally convinced me.  So into the oven they went:  Raisin and Lemon Zest scones with clotted cream.  Well, he seemed to really, genuinely enjoy them ... or at least was not completely offended with my attempt at this British classic, phew!  :-)  


EGGS EN COCOTTE (1 per person)
2 Eggs 
1 tablespoon buttermilk (or whole milk)
Sprinkling of cheese
Salt & Pepper
Fresh Chives, chopped
6-8 oz ramekins

Preheat the oven to 350F.  Butter the ramekins.  Sprinkle cheese into the ramekins (about a tablespoon).  Crack the eggs into the ramekin, being careful to keep the yolks whole.  Pour the milk on top of the eggs.  Do not mix.  Sprinkle with more cheese if desired, salt and pepper, and chives.

Place the ramekins in an oven dish.  Fill the dish with water, enough that it covers at least half the ramekin height.  Place in the oven and bake for 15-20 minutes, or until the eggs are cooked.  Serve with toast cut in strips for easy dipping!  


ROSEMARY ROASTED SWEET POTATOES
3 Sweet Potatoes, peeled and cut into 1/2" squares
2 springs of rosemary
Olive Oil
Kosher Salt
Pepper


Preheat oven to 400F.  Line a large baking dish with parchment paper (for easy clean up!).  Add the sweet potato pieces.  Sprinkle with olive oil, salt, and pepper and add the rosemary springs.  With your hands mix the potatoes to make sure they are all coated.  Don't worry if the rosemary starts to break.

Place in the oven and cook for 30 minutes or until the potatoes are tender.

Enjoy!

Related Posts with Thumbnails