So with the apartment already smelling like
bacon, and a brand
new dutch oven what else could I make for dinner but Beouf Bourguinon of course! This is one of my favorite dishes. I first had it in Paris at a tiny restaurant on Ile St Louis. Days after we came back from our trip we were already craving it, and had to set out to recreate it. I've been in love ever since.
It's one of those wonderful dishes that stews for hours, and the meat becomes perfectly tender. It originated as a peasant dish in Burgundy using wine as a way to tenderize the meat, and eventually became a standard in french cuisine when it was adapted by
Escoffier. In France, they recommend you make it a day beforehand and let the flavors continue to develop. Up to you... but I'll warn you, it's hard to resist having a plate as soon as it comes out of the oven. :-)
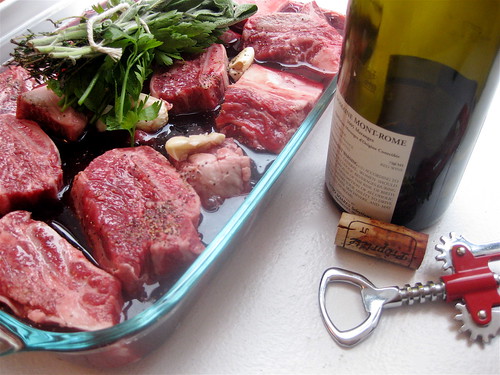
So A. and I took a trip to
Ottomanelli's in search of meat! Traditionally this is made with chunk steak, but I decided to try short ribs. You can try variations and decide which you like best, I love the 'melt in your mouth' texture of short ribs. The first time I made this dish, I made it in a 3 quart dutch oven and it was perfect for 2 with leftovers for the next day. But with f
riends coming over, I made double the portion in a 6.5 quart pot. It's the same effort to make more... so if you have a large enough pot, why not? The leftover actually freeze very well.
Enjoy!
4 lbs Short Ribs (or chunk steak), cut into 1.5" cubes
1 bottle (750ML) Red Wine, preferably Burgundy
1 1/2 cups good quality beef stock
5 garlic cloves
Bouquet Garni (sprigs of thyme, parsley, bay leaves tied together with twine)
1/2 stick of butter
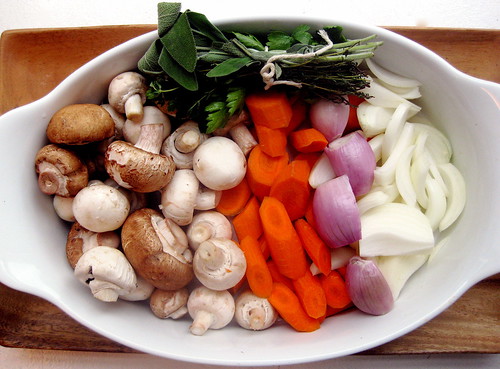
2 onions, chopped
4 carrots, chopped
3 tablespoons All Purpose Flour
8 oz Bacon, chopped
3 Shallots, peeled but left whole
3 cups mushrooms (I used a mix of crimini and white mushrooms)
Place the meat, wine, garlic, and bouquet garni in a large bowl and leave in the fridge for at least 3 hours, preferably overnight (especially if using chunk meat).
Preheat the oven to 315F. Drain the meat, and reserve the marinade and bouquet. Pat the meat dry with a paper towel.
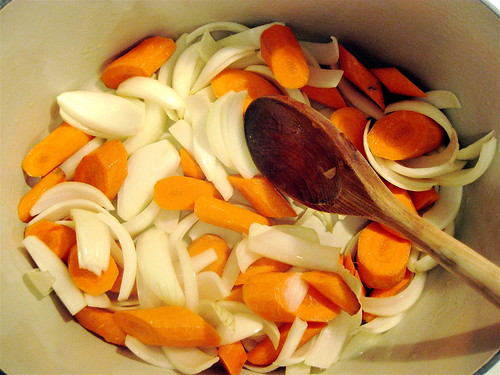
In the casserole, or dutch oven, add 1 oz of butter over medium heat. Add the onions, shallots, carrots, and bouquet garni stirring occasionally. Cook for 10 minutes. Remove from heat.
In a separate large non-stick skillet, over high heat, add 1 oz of butter and the bacon. When the bacon starts to crisp, remove it from the pan but keep the bacon fat. Reserve the bacon pieces. Sear the pieces of meat in batches in the butter and bacon fat, adding to the casserole/oven dish when fully browned. Pour the wine marinade and beef stock into the skillet when you are done browning the meat to deglaze the pan. Allow the marinade to boil for at least 30 seconds and remove from heat.
Reheat the casserole/oven dish to high heat and sprinkle the meat and vegetables with the floor. Stir to make sure all pieces are evenly coated with the flour. Add the bacon pieces, and pour in the marinade and stir well. Bring to a boil. Place the dish covered in the oven for 2 hours.
When the casserole is ready remove form the oven and in a non-stick skillet, add the remaining butter and brown the mushrooms over high heat. Add the mushrooms to the casserole and stir.
Remove the bouquet garni, skim any fat from the surface, and add fresh parsley as a garnish. Serve with crusty bread or a pile of mashed potatoes.
...and voila, c'est tout! Bon appetit!


