Saturday, December 19, 2009

Waiting for Snow :: French Toast with Orange Maple Butter


I woke up early today excited about the first snowfall this season, we're supposed to get 8" here in NYC!   I admit that I always enjoy the snow, but I especially love it right before Christmas.  Doesn't it make everything feel like the holidays are here?  A. and I sat by the window, drank way too many cups of coffee and ate delicious french toasts waiting for the flurries to start falling.  I can't imagine anything more Christmas-y than that! :-)

The french toasts were delicious!  Perfectly crispy, but still creamy on the inside... with a slight vanilla sweetness... all topped with an orange zest and maple butter.  Yum!


I had a giant bowl of oranges and grapefruits sitting on the counter, so I thought of making orange flavored butter to top our breakfast!  It was perfect.  I'm actually surprised the spread made it to the french toast because it was so delicious, A. and I kept 'tasting' it with bread...you know, to make sure it didn't need anymore salt or anything.  :-)

Most french toast recipes call for a baguette or for Challah bread, but I used a Portuguese loaf.  I find that baguettes are too thin and you get too much crust in each slice with not enough of the center.  Challah is the perfect size, but a bit too 'egg-y' in french toast.  The Portuguese loaf was perfect!  

Top with plenty or warm maple syrup and fresh fruit ... Enjoy!


THE MOST DELICIOUS FRENCH TOAST 
Serves 2
6 slices Portuguese Bread (about 3/4" thick)
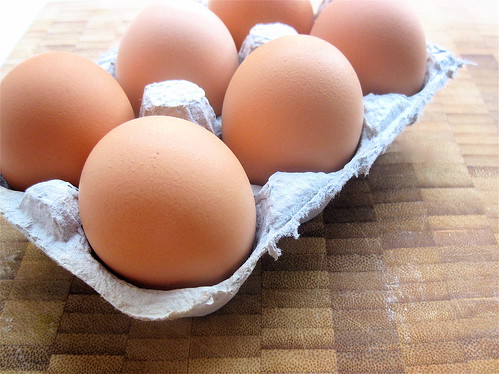
4 Eggs
1/2 cup Whole Milk
1 teaspoon Vanilla
2 1/2 tablespoons Sugar
1/2 teaspoon Orange Zest
1 teaspoon orange juice (preferably fresh squeezed)
dash of Salt
Butter for pan

In a baking dish, whisk the eggs, milk, vanilla, sugar, zest, juice, and salt.  Add the slices of bread until they are completely covered in batter.  Pierce the slices with a fork to make sure the batter gets to the middle.  Leave the bread in the mixture for 15 minutes, flipping over once to make sure all sides are completely covered.


In a non-stick pan, over medium heat, add a couple of tablespoons of butter.  When the butter starts to bubble, add the toasts.  Lower heat if the butter starts to burn.  Cook the french toasts until crisp on one side and flip over.  Make sure the inside is cooked thoroughly before removing from heat.  Serve immediately.


ORANGE MAPLE BUTTER
1/2 stick unsalted butter
1 teaspoon orange zest
2 teaspoons maple syrup dash of salt

Add all the ingredients to a food processor and mix.  Taste for salt and sweetness.  You can leave in the fridge until ready to use.


Tuesday, December 15, 2009

Testing Recipes :: Rustic Berry Galettes


I have to admit I've been a very lazy blogger lately.  :-(  I thought the holidays would have me to the kitchen everyday baking batches and batches of cookies and giant feasts, but it's been just the opposite.  A. and I have been ordering an absurd amount of takeout, I haven't been to the farmer's market in weeks, and I hardly remember where it is that I store all of my kitchen contraptions.  It's actually quite sad now that I think about it.  ...I've just been so busy lately, with work, holiday get- togethers, and holiday shopping that it's sort of just happened; and I've missed it.

But, I'll stop complaining, and get cooking. :-)  

I decided to start testing ideas for a Christmas Eve dessert.  My parents will be making a delicious dinner, and I volunteered to make dessert.  I wanted something different, not too heavy, and individual sized.  So I thought: mini-galettes filled with berries!  Perfect! Don't they look like rustic little presents?  I topped them with a heaping spoonful of creme fraiche and lemon zest.  Who wouldn't be excited to get this on their plate at the end of a meal!

You can use fresh berries if you find them, or use up any frozen ones you have leftover from summer.  The dough  was much easier than i imagined.  It is a basic Pate Brisee french pie crust which I made without a food processor (since I only have a mini-prep) by grating the almost frozen butter.  I used the recipe from Joy of Baking ...and rather that re-explain the process, I'm posting the link since I think their instructions are perfect!

Enjoy!

MINI BERRY GALETTES  (inspired by Milk Eggs Chocolate)
1 batch Pate Brisee dough
3 cups of mixed berries
1 teaspoon Cinnamon
2 tablespoons brown sugar
1 cup cream cheese
4 tablespoons Powdered Sugar
1 teaspoon Vanilla
Lemon Zest and Creme Fraiche (or whipped cream) for garnish

Make the Pate Brisee dough.  *If you are not using a food processor incorporate the almost frozen butter into the flour by using a cheese grater to cut up the butter into small pieces.  Then quickly mix with your hands or a metal dough whisk if you have one.  Divide the dough into 8 pieces and store in the fridge in plastic wrap for 30 minutes.


Preheat the oven to 400F.  Season the fruit with the brown sugar and cinnamon in a mixing bowl.  In a separate bowl, whisk the cream cheese with the sugar and vanilla. 

For each tart, roll out a piece of dough to be about 6" in diameter.  Spread about 2 tablespoons of the cream cheese mixture in the center, making sure you leave 1" all around with no spread.  Top the center with a small mound of the berries (divide equally into 8 parts).  Crimp the edges of the dough over the fruit to create a crust.  


Continue to assemble the tarts.  Bake on a lightly floured baking sheet for 30 minutes or until the crust is golden and the fruit is bubbling.

To serve, top with a spoonful of cream and grate a bit of lemon zest over each tart. 


Tuesday, December 8, 2009

Holiday Gift Guide 2009 :: For the Baker


Have you started your holiday shopping?  I'm starting to worry a bit, because in spite of all of my gift daydreaming, I haven't actually 'bought' anything yet.  Oooops!  Well there's still time... and I will say that scouring the web for gift ideas is almost as fun as receiving them. :-)

So the Holiday Gift Guide continues!  I'm in love with all of these goodies perfect for anyone who ♥'s baking!  Wouldn't the vintage red scale look wonderful on a a countertop?  Almost as perfect as having an embosser to stamp everything in sight (yes... that's what I would probably do!).  

Enjoy!
  • You can't be a baker without a kitchen scale! Vintage Red Kitchen Scale $39.95 (Pillsbury Store.com). I also ♥ this one from Salter at Walmart - $15
  • Pretty twine in different colors for wrapping all those homemade goodies.  It comes in large spools perfect for leaving on the counter.  Divine Twine $15.
  • Wouldn't a chocolate souffle look beautiful in these heart molds?  Charlotte Molds for making puddings, jellies, and souffles.  Sur la Table, starting at $18
  • Beautifully simple!  Emille Henry 9" Pie Dish $45 (Macys.com
  • Milk container perfect for serving with all of those fresh baked chocolate chip cookies!  Half Pint glass creamer from the MOMA store, $14.
  • A collection of delicious Madagascar Nielsen-Masey vanilla.  Beans, extract, paste, and sugar...oh my!  William Sonoma, all for $56
  • Personal embosser to create gift tags or emboss cookbooks, recipes, etc.  Williams-Sonoma, $40
  • 'Birds in the Kitchen' Print $16 (etsy.com)
  • Personalized baker's labels to sticker on all of your cookie boxes, jars of preserves, oven bags of homemade dog treats! :-) $40

Sunday, December 6, 2009

Holiday Gift Guide 2009 :: For the Tea Lover


Ok, here we go!  The start of the holiday gift ideas.  A. and I put up our wreath today so I'm in a very Christmas-y mood! :-)

First up: for the tea lover.  All things I ♥ tea related that make the perfect gift on their own or combined.  Wouldn't a vintage tea set be perfect wrapped with a colorful jar of Kusmi tea, or how about treating your friend to a holiday afternoon at Tea & Sympathy?

Enjoy!

  • French macarons of course!  Nothing goes better with tea than beautiful macaroons.  Delivered anywhere by MadMacNYC.com (starting at $18)
  • A beautiful vintage Silver Tea Set! Only $32! (etsy.com many more on ebay)
  • My favorite tea: Kusmi.  A.'s favorite is 'Anastasia', mine is 'English Breakfast. (Kusmi.com or stop by McNulty's in the West Village)
  • Tiered Cake stand perfect for afternoon tea sandwiches and cakes $45 (etsy.com)
  • ...or  the new "I ♥ Macarons" cookbook $15 (Amazon.com)
  • If you happen to be in Paris...bring back the delicious tins of Fauchon tea cookies (... why can't they deliver to the US???)
  • A relaxing afternoon at Tea & Sympathy, West Village NYC.  Afternoon tea: $35/pp (no reservations)
  • Deliciously aromatic tea sachets from the French Mariage Frere (Dean & Deluca)
  • Honey Spoons that melt in your tea as you stir...yum!  ($15 for 8)

Thursday, November 19, 2009

Things I ♥ :: Holiday Gift Guide!


Anywhere you go it feels like the Holidays are here, I love it!  It makes me crave pumpkin pies, and peppermint lattes, and big bowls of stuffing.  ...Yes, I actually like the stuffing a bit more than the turkey... but shhh! :-)

Sorry for the lack of posts (really!!!), but A. and I took a few weeks off and went on a small vacation to visit family for Thanksgiving.   So I've been staying clear of the kitchen.  In the meantime, and in the spirit of getting ready for the Holiday shopping madness...I thought I'd share a few of my favorite things:  a Holiday Gift Guide!  It starts tomorrow....so get ready!!!

...all things food, kitchen, entertaining, related,  and a few of my random faves for everybody on your list:  you're mom the baker, you're friend the tea lover, your co-worker the chocolate fiend, or your husband the vanilla-syrup addict (...yes, A., that's you!)  or even for yourself (come on, shopping is hard work, everybody deserves a little reward!)

Hope you enjoy!  Stay tuned!

Saturday, November 14, 2009

Farmer's Feast :: Apple & Beer Roasted Chicken w/sides


It's such a dreary day here in NYC:  grey, chilly, and rainy.  Oh...I'm not complaining... I actually love days like today, lazy Saturdays!  It made me remember that I had yet to post a delicious meal we had a couple of Sundays ago when the weather was very much like today.  Just one of those days when you don't want to leave the house.  So we stayed in.  

 The menu:
- Apple & Beer Baked Whole Chicken
- Roasted Asparagus
- Parmessean Polenta Bites
- Roasted Butternut Squash Puree


It reminded me of a rustic farmhouse meal... nothing too fussy.  Just simple, roasted food.  

I was feeling so lazy, I didn't tie the chicken, I simply used a skewer to hold the drumsticks together.  It actually worked very well!  The chicken is delicious with the sweetness of the apples and the bitterness of the beer.  And the roasted squash is so sweet from the oven roasting it tastes almost like sweet potatoes.  It all went perfectly with the crispy oven roasted polenta with Parmesan, and simple asparagus side.  

Enjoy!


APPLE & BEER BAKED WHOLE CHICKEN
1 whole Chicken (about 2-3 lbs, preferably free range)
2 baking Apples, cored and sliced
1 bottle of beer
2 tablespoons Light Brown Sugar
3 tablespoons Butter, room temperature
1 tablespoon Herbes de Provence
1 teaspoon Cloves
Salt & Pepper

In a heavy duty baking oven (I used a 5qt Dutch Oven)  add the beer, apples, and cloves.. In a small owl, combine the herbs, butter, sugar, salt and pepper.  Rub the chicken with the mixture.  Go under the skin of the chicken with the rub as well.  Place the chicken in the baking oven with the liquids, and allow it to season in the fridge  for an hour.  


Preheat the oven to 375F.  You can place a skewer through the two drumsticks to keep them in place.  Place the baking dish in the oven.  Cook, covered, for about 45 minutes or until the temperature of the inner thigh reaches 170F.  (While the chicken is cooking, baste the chicken with the beer about every 15 minutes).  Uncover the dish, place oven on broil (500F) and cook for another 10 minutes.

Remove the dish from the oven.  Allow the chicken to rest for 1o minutes, and carve.  Serve with the cooking liquids and apple slices.


ROASTED BUTTERNUT SQUASH PUREE
1 Butternut Squash, peeled & cubed
Olive Oil
Kosher Salt
2 tablespoons heavy cream


Preheat the oven to 400F.  Toss the squash with a bit of olive oil (enough to coat) and salt.  Place on a baking sheet & cover with foil.  Cook for about 30 minutes or until softened.  Remove from the sheet and place in a bowl.  Add the cream and taste for salt.  With an immersion blender (or potato masher) puree the squash, but still keeping a bit of the chunks.  

BAKED POLENTA SQUARES (adapted from 101 cookbooks)
1 1/2 cups Polenta
1 cup Milk
2 cups Chicken Stock
1 cup Water
1/2 cup Parmesan
Melted Butter (about 3 tablespoons)

In a large saucepans, bring the liquids to a boil.  In a slow stream, add the polenta while stirring constantly to prevent lumps.  Lower the heat to low and add salt to taste (be careful - depending on the amount of salt in your stock you may not need additional salt).  Continue to stir while the polenta thickens.  Add the cheese.

Remove from heat and spread the mixture into a slightly buttered baking dish to about 1/2" thick.  Chill in the fridge for at least one hour.


Carefully flip the baking dish over onto a cutting board.  Using a sharp knife cut the polenta sheet into desired shapes.  I cut into squares, and then cut those into triangles.  Brush the pieces with the melted butter.

Bake the pieces in a 450F oven for 15-20 minutes until they start to brown.


Tuesday, November 10, 2009

For Dinner :: Tarragon Mustard Chicken & Mushroom Crepes


We've been talking about going to Cafe Henri for months.  It's a little Parisian crepe cafe in the West Village on Bedford St.  We walk by it often, have heard great reviews.  But it's one of those things you always think about, but when trying to think of places to go for dinner - we always forget it!  Well, we were finally going to go Sunday but last minute we got lazy, ordered pizza, and watched movies.  Oh well... someday! :-)

But, last night, still craving crepes, I thought: why not just make them at home? 

For the crepe batter I used the recipe from the wonderful  'The Food of France" cookbook (one of my faves... really one of the only cookbooks I consistently pull out), and for the filling I decided to improvise using a delicious tarragon mustard I had gotten recently.  I have to admit that condiments are one of my little obsessions! (...if you can't get tarragon mustard, you can replace it with dijon mustard and chopped tarragon)  

Isn't tarragon delicious?  It's sweet, with a bit of a licorice taste and just enough spice.  I love it in bernaise sauce atop a steak frite, but it also goes so perfectly with chicken ...and mushrooms!  So that's what I came up with:  a tarragon mustard chicken in a creamy mushroom and shallot wine sauce.  All inside delicate french crepes and broiled with gruyere cheese!


Yum, yum, yum!!!  What's not to love about crepes, gruyere, and a creamy, spicy tarragon chicken?

It was delicious!  It's funny how sometimes dishes just come together on a whim and seem to work out perfectly.  A. officially named it one of his top 5 dishes (I'm still trying to find out what the other 4 are!  I think Soupy Dumplings are up there)

Anyway... enjoy! :-)


TARRAGON MUSTARD CHICKEN & MUSHROOM CREPES
(serves 4)
4 chicken breasts
Juice of 1 lemon
Springs of Thyme, about 5
2 + 1 tablespoons Tarragon Mustard, divided (you can replace with 3 tablespoons Dijon Mustard, and 1 tablespoon chopped Tarragon)
1 Shallot, chopped
2 cups of mushrooms, slices
1/2 cup Heavy Cream
2 cups dry white wine
2 tablespoons Butter
1/3 cup Gruyere, grated
Salt & Pepper to taste
Olive Oil

Crepes:
2 cups All Purpose Flour
1 teaspoon Sugar
Pinch Salt
1 2/3 cups Milk
1/2 cup water
2 eggs
1 teaspoon melted unsalted butter

Season the chicken with 1 tablespoon mustard, lemon juice, drizzle of olive oil, and salt and pepper to taste.  Allow the chicken to marinate in the refrigerator for 30 minutes (or while you prepare the crepes).


To sautee the chicken do not use a non-stick pan, you want the chicken and vegetables to stick a bit so you can then deglaze.  Heat the pan over medium heat and add a drizzle of olive oil.  When the oil starts to bubble, add the chicken breasts.  Allow the chicken to cook almost completely.  Remove from the pan and set aside on a plate.

In the same pan, add the chopped shallots and a dash of salt.  Sautee until they start to become clear.  Add the mushrooms to the pan and continue to cook.  Add more olive oil if needed.  When the mushrooms start to brown and soften, deglaze the pan with the wine and cream.  Add the remaining mustard and taste for salt and pepper.  Allow the sauce to come to a boil.


Cut the chicken into 1/2" pieces and add into the sauce.  Allow the sauce to continue to simmer until the chicken is cooked through.  Remove from heat.

Now you are ready to assemble the crepes!  Preheat the oven to broil (500F).  Lay one crepe flat on the oven pan you will be using.  Add the chicken and mushroom sauce to half of the crepe.  Fold the crepe over in half, and then once over itself again to create a cone shape.  Repeat with all crepes (you should have enough chicken for about 8 crepes) and arrange the crepes next to each other in the pan.  Pour any remaining sauce into the pan.  Sprinkle the crepes with the cheese.  Place in the oven for 8-10 minutes until the cheese browns and the crepes start to crisp.  Serve immediately with a green salad.


For the crepes:  
Sift the dry ingredients and mix together.  In a separate bowl whisk the eggs, milk and water.  Create a well in the middle of the dry ingredients and slowly add the liquids into the middle while whisking to prevent lumps.  Add the melted butter and continue to whisk until the batter is smooth. Let the batter rest for 20 minutes.  

When ready, heat a large non-stick skillet over medium-high heat.  Add a bit of butter to the pan and add about 1/2 of batter per crepe.  Move the pan around in a circular motion to create a thin uniform layer of batter in the pan.  Continue to cook for about 2 minutes.  Remove the crepe from the pan and place on a plate covered with a paper towel while you continue to cook the rest of the batter.


Oh...for dessert?  Crepes with Nutella, of course!  Just smear any leftover crepes with about 3 tablespoons of Nutella and serve with powdered sugar.  :-)

Sunday, November 8, 2009

Sunday Morning :: Egg & Black Truffle 'Brouillade'


It's A.'s birthday next Sunday!  In celebration of the start of his b-day week I wanted to make a delicious breakfast this morning.  And what better way to start the day than with fresh black truffles?

I went on a bit of a truffle frenzy the other day when walking around Chelsea Market.  I walked out with a jar of truffle butter, truffle ricotta raviolis from Boun Italia, and my very own black truffle!  Isn't it lovely? I'm so in awe of where these little things come from and their rarity.


The price of truffle by the pound is pretty intimidating, but you can buy one truffle (roughly: 1 ounce) for around $20 - $25.  Or truffle butter for around $10 for a 4 ounce container.  There are also a great variety of affordable truffle flavored oils which are great for risottos or pastas.

Excited with my little truffle, I started doing some research on potential dishes.  I saw mention of a french dish called a "Brouillade" (which means 'scrambled') of eggs and black truffles.  So tempting... and you can't ask for more luxurious breakfast!  I ran out for a fresh baguette and started cooking. 

It's traditionally one of the first dishes served from the truffle harvest. You allow the eggs to sit overnight (up to 2 days) with the truffles so that the aroma starts seasoning the eggs.  Then the eggs are slowly cooked with the shaved truffle, heavy cream and butter over a 'bain marie' to create a a creamy, smooth, aromatic scramble.  

It's so delicious, and elegant!  The slowly cooked eggs are velvety smooth, and the truffle taste is delicate but distinctive.  Perfect!!!  ...I might start serving this as a dinner appetizer.  

Enjoy!  


EGGS with BLACK TRUFFLES "BROUILLADE"
(serves 2)
6 large Eggs
1 ounce Truffle
2 tablespoons of Heavy Cream
1 tablespoon unsalted butter (or Truffle Butter for a stronger taste!)
Salt & pepper to taste

This recipe is all about the few ingredients, so use good quality eggs.  I always buy free-roaming eggs.  


Clean the truffle by running it over a gentle stream of cold water to remove any dirt, pat dry.  Store the eggs in an airtight container with the cleaned truffle in the middle overnight or for up to 2 days.

When you are ready to prepare the eggs.  Crack the eggs open and whisk with salt.  Shave the truffle thinly, set aside a few whole shavings for garnish, and finely chop the others and add to the egg mixture.  Store the eggs and truffles in an airtight container in the fridge for 2 hours.


Bring the water in the 'bain marie' bottom pot to a boil. (Note: I do not have a 'bain marie' pot so instead I use a stainless steel mixing bowl that fits perfectly atop one of my sauce pots.  In a pinch, use a non-stick skillet over the lowest heat).  

In the top portion of the double boiler pour the egg mixture and the cream.  Whisk the eggs continuously as they start to cook and thicken.  Do not allow the eggs to scramble.  You want a creamy consistency instead of large lumps.   As the mixture starts to thicken, add the butter and more salt to taste.  Continue to whisk until cooked but remain creamy.  The total cooking time will be no longer than 8 minutes.


Remove from the heat and serve immediately.  Garnish with truffle shavings and accompany with fresh baguette or country bread slices.


Perfect Topping :: Stewed Berries w/Creme de Cassis


Sorry for the lack of posts this week, I've been feeling a bit under the weather. :-(  But I'm feeling much better and am back to the kitchen... and computer! :-)  

It's been so chilly here in NYC that I've been craving anything warm.  Even warm fruit!  Stewed fruits are delicious, it brings out all of the fruits sweetness.  You can stew berries or pit fruit with your favorite spices or liquors and use as a topping for anything from oatmeal to ice cream or cakes.  It's the perfect Fall treat!  And the perfect use for any frozen fruits you might have leftover from the summer... or fresh ripe berries.  

I used frozen strawberries and blueberries, and fresh blackberries; and spiced it with cinnamon, lemon and Creme de Cassis.  Creme de Cassis is a French blackcurrant liquor which is used to make the delicious and beautifully colored Kir Royale champagne cocktail.  It's perfect to have around for the holidays (look for a Creme de Cassis 'de Dijon'). 

These berries are perfectly sweet and tart, with a delicate syrup.  A.'s been topping vanilla ice cream with every night.  :-)  Yum!

Enjoy!

STEWED BERRIES with CREME de CASSIS
1 cup Blackberries (divided into 2)
1 cup Strawberries (divided into 2)
1/2 cup Blueberries
2 tablespoon Honey
1 Cinnamon Stick
1/3 cup water
Juice of half a lemon
2 teaspoons Creme de Cassis

In a heave saucepan over medium heat add half the blackberries and strawberries, the blueberries, honey, cinnamon stick, lemon juice and peel, and water and bring to a boil.  Lower heat, and continue to cook uncovered while stirring occasionally for 10 minutes.

The liquid will become a syrup.  Taste the syrup fro sweetness and add more honey or lemon juice to taste.  Add the Creme de Cassis and let it come to a boil again.

Remove from heat and add the remaining berries.  Enjoy warm over ice cream or cake, or store in the fridge and keep for a week.

Monday, November 2, 2009

How To :: Poach Salmon


I ♥ fish, but I confess that I shy away from cooking it on a daily basis because of the strong smell.   And I'm not one to shy away from food smells, but when you are in a small, open loft apartment, it's something you think twice about.  A. and I spend hours devising ways to keep my many food experiments from spreading to the whole apartment! 

So, when I read recently that poaching fish is virtually odorless, I was sold.  Plus, I enjoy the moist texture of poached fish fillets, and it's delicate, aromatic taste.  It's delicious (and healthy!) served warm with roasted vegetables, or topped with a rich sauce (this recipe with a caper butter sauce sounds delicious), or as part of a french Nicoise salad (instead of canned tuna).  

Traditionally, the fish is poached in a pot called a 'poissonierre' which is elongated to fit a large whole fish.  It contains a liftable tray (almost like a pasta pot) that easily separates the fish from the liquid.  Although it is a wonderful pot, you can poach fish in any sort of heavy skillet or dutch oven.

I got the most wonderful surprise last Friday when I got home and had this beautiful, new 5 qt dutch oven sitting atop my stove.  Can you believe it? It's like the kitchen fairy snuck in and left me goodies!  Well, no, it wasn't a fairy,  it was a wonderful gift from my parents to whom I've been endlessly telling (and they've patiently listened) about all of my kitchen obsessions.  Well, since last week, I've used it in all my cooking.  It's the perfect size (not to mention color!).  ...And perfect for this recipe.


You can poach many different fish, but, thicker, more solid fish works best, such as: salmon, cod, tuna, or monkfish. I used wild salmon fillets.  Poached salmon is usually seasoned with dill, but I used cilantro which I think goes wonderfully with fish.  To serve, I drizzled it with a bit of olive oil and fresh lemon.  Very simple.  It's a perfect weeknight meal... the best part: the leftovers will be delicious tomorrow over a salad!

Enjoy!

POACHED SALMON
4 - 4oz fillets of Wild Salmon (about 1" thick)
2 cups dry white wine
3 cups water
1 Lemon
2 Carrots, chopped
Fresh Cilantro, chopped
Salt & Pepper
1 tablespoon Strong mustard (such as Colmans or a Dijon)

Season the salmon fillets with the juice of 1/2 a lemon, salt & pepper, and a smear of mustard.


In a heavy skillet or dutch oven, over high heat, add the wine, water, juice of 1/2 a lemon along with the lemon rind, a bunch of chopped cilantro, chopped carrots, and salt & pepper to taste.


When the liquid boils, carefully add the salmon fillets.  Make sure the fish is fully submerged in the liquid.  Lower to medium-high heat and allow the liquid to continue to simmer.  Cook the fish for 3 minutes on one side and then flip over the fillets for another 3 minutes.  Be careful, this will cook very quickly.


Remove the fillets from the liquid and serve warm with a drizzle of olive oil and fresh cilantro, or allow the fish to cool and store in the fridge for cold salads.

*The seasonings to the wine/water can be changed to your tastes.  Try dill and shallots, or even add beetroot for added color and a bit of earthiness.


Sunday, November 1, 2009

Happy Halloween :: Gorgonzola & Sage Flatbreads


After a disastrous afternoon of cookie baking (so sad!), I was not too excited to go back to the kitchen.  But my second experiment of the day turned out much better! :-)

Our friends S. & N. were coming over to help greet the trick-or-treaters.  I wanted to have something easy to eat, something that we could munch before heading out.  So, I opened up the fridge and came up with these cheesy, roasted flatbreads, perfect!  I topped one with Gorgonzola and orange peppers, and one with brie and ham.  And added fresh sage leaves and honey to both.  Perfectly salty, savoury, and sweet!

Fresh Direct has a great pizza dough which I always have in the freezer, but feel free to make your own.  This is a perfect recipe to use up leftover cheeses.  I think the honey and sage bring it all together, especially when paired with the pungent Gorgonzola.  

Enjoy!

GORGONZOLA & SAGE FLAT BREAD
1 Round of Pizza Dough
1/2 cup Gorgonzola
1 Orange Pepper (you can replace w/other vegetables: squash would be delicious!)
Fresh Sage Leaves
Olive Oil
Pepper
Squeeze of Honey
Watercress or Rocket Lettuce for garnish

Preheat oven to 375F.  Place the defrosted pizza dough on a cookie sheet lightly greased with olive oil.  Spread the dough to create a flatbread but be careful to not stretch the dough too much so that it breaks.  It doesn't have to be a perfectly even shape.

Cook the bread for 15 minutes or until it starts to bubble up and crisp.  Remove from the oven.

Top the bread with the peppers, gorgonzola, and sage leaves (about 5 leaves).  Drizzle with a bit of olive oil and honey.  Sprinkle with pepper.  


Turn oven to Broil (500F).  Place the flatbread back in the oven for 5-8 minutes or until the cheese melts and the crust starts to brown.

Allow the flatbread to cool for 5 minutes.  Garnish with a pile of watercress lettuce on top and slice and serve

Happy Halloween :: Scary Cookie Experiment


Happy Halloween!!!  Hope had a spooktacular day!

I was very excited to spend the day baking chocolaty owl cookies for all of our trick-or-treaters!  I had seen Thomas Keller's Oreo cookie recipe on The Kitchn.  It's Bouchon Bakery's recipe for their famous chocolate cookies sandwiched with a white chocolate frosting.  Doesn't that sound divine and look adorable? 

I'm not usually a decorated cookie baker.  I love rustic desserts: simple pastries, fresh fruit tarts, traditional cookies, and buttery pound cake... food coloring and frosting doesn't usually do it for me.  But it's halloween!  So I bought a scary owl cookie cutter and even a piping bag and was ready!

But it was a disaster.  :-(  

The cookies were too crumbly and fragile to be easily assembled, my tiny kitchen looked like a chocolate tornado had hit the West Village, and the dough was way too buttery and sticky for cut-out cookies.  They lost their shape once they were cooked, and even after I cooled them for hours, they broke when I tried to pipe them with frosting.

The picture above is the uncooked dough... it had great promise, all before it got into the oven!

I thought it was just me, but after reading some of the comments on their post this morning, it looks like other halloween bakers had similar issues with the recipe.   (Don't you love recipe comments?)  I think some of the measurements in the recipe are off. 

Oh well!  I went ahead and assembled the ones I could, and the kids didn't seem to mind too much.  I think it helped that I also had a giant bowl of candy bars.    Happy Halloween!

Friday, October 30, 2009

Happy Friday :: The Botany of Desire


Happy Friday!  What are you doing this weekend?  A. and I stayed in tonight and watched the thought provoking PBS documentary "Botany of Desire".  Amazing!   It's based on Micheal Pollan's book -  which I have not read but is next on my 'to read' list.  You're view of food will never be the same.  I highly recommend the show.  We ordered the most delicious pork enchilladas from Mexicana Mama, and watched tv... what a perfect friday night! :-)


Oh, I'm also getting ready for a full-fledged morning of baking tomorrow: Happy Halloween!  I can't wait.  I have all new cookie cutters, so a few spooky posts to follow tomorrow morning.  :-)

Tuesday, October 27, 2009

Warm Salad :: Toasted Brussels Sprouts w/Cranberries


I ♥ brussels sprouts!  They're a little bitter, perfectly crunchy, and go well with mostly anything.  I didn't start enjoying them until a couple of years ago,  so I must be making up for lost time, because I can't get enough of them now.   Raw and shredded, sauteed, or roasted; pretty much anyway you serve them... but  I especially enjoy them in the Fall as a side to anything roasted.  

Tonight, I sauteed them and topped with plenty of cranberries, a bit of Parmesan and seasoned it all with a garlic olive oil and lemon juice.   A quick weeknight warm salad!  It was delicious!

...Wouldn't this be a perfect side for Thanksgiving? 
Enjoy!

TOASTED BRUSSELS SPROUTS w/CRANBERRIES
2 cups Brussels Sprouts (1 small box), halved
Handful of Dried Cranberries (or fresh! but add a bit of honey)
Juice of half a lemon
Olive Oil
Salt & Pepper
2 cloves of garlic, peeled
Grated Parmesan

In a large skillet over medium-high heat, heat the olive oil and garlic cloves.  When the garlic starts to brown, add the brussels sprouts.  Mix with the oil and garlic cloves until the brussels sprouts are covered in olive oil.  Continue to saute until the sprouts start to brown.  Add the cranberries, lemon juice, and salt and pepper to taste.  When the brussels sprouts are crispy, remove from heat.  Top with grated Parmesan and serve.


Thursday, October 22, 2009

Cookie Jars :: Lemon Zest Shortbread


Last night, with way too many things on my to-do list, I decided to not do any of them and instead: bake cookies! So much more fun. Well, I rationalized it with the fact that the holidays less than 2 months away so it's really time to start picking/testing cookie recipes. :-)

The truth was that I had bought a new cookie cutter in the morning and could not wait to try it. Especially when I realized that the size fit perfectly into my glass jars! (...yes, I know, I am obsessed with these) But how cute are these glass jars filled with cookies? I wanted a cookie that would keep well for a few days, so I came up with Lemon Zest Shortbread cookie jars. A few jars for us, and a few to share.

Shortbread is the most basic cookie recipe: flour, butter, sugar, and a bit of vanilla. That's it! It's a Scottish tradition, dating back to the 12h century. It's name coming The traditional recipe is 3 parts flour, 1 part sugar, and basically for every cup of flour, 1 stick of butter. This is all about the ingredients, so you need to use good quality butter and pure vanilla extract. When researching shortbreads I found out that butter has a rating system (who knew!). Look on the box and look for a "AA" rating. As for vanilla, I *heart* Nielsen-Massey Madagascar Vanilla.

I think it's the perfect holiday cookie... Picture a snowy holiday morning, staring out the window, with a big cup of tea and little shortbread cookies.

PS: I'll warn you... there are alot of pictures of cookies coming up! Sorry, but what better way to start the weekend than cookies? :-)

Enjoy! Happy Friday.


LEMON ZEST SHORTBREAD COOKIES
3 cups of all-purpose flour
1 cup fine sugar (or powdered sugar)
3 sticks unsalted butter
1 teaspoon of vanilla (pure, not vanilla extract)
1/4 teaspoon of salt
*Optional: Zest of 2 lemons

Preheat the oven to 350F. Combine the butter and sugar with a hand blender until creamy. In a separate bowl mix the flour and salt. Add the flour and salt to the butter and eggs, along with the vanilla and lemon zest. Continue to mix with a hand blender until the dough has started to come together.

Place the dough on a light floured surface. With your hands shape the dough into a large disk. Wrap the dough in plastic wrap and chill for 30 minutes.

Roll the dough to 1/4" thick and cut your cookies. You can use a cookie cutter, or use a pairing knife and a ruler and make straight cuts along the dough to get rectangular cookies. To bake, place on top of parchment paper or on a lightly buttered and greased cookie sheet, and into the oven for 20 minutes or until the edges start to brown. (At this point - you could also freeze the dough).


Remove the cookies from the baking sheet and allow them to cool on a rack. I don't own a cookie rack, so I use the rack from my microwave oven. It does the trick!


When the cookies are at room temperature, store them in air tight containers. They will keep for over a week.


Enjoy with a cup of coffee or tea for dunking. :-)


Related Posts with Thumbnails