Showing posts with label Dessert. Show all posts

Sunday, January 10, 2010

Honey, Honey :: Local Clover Honey Frozen Yogurt


I know, I know... ice cream in the middle of winter?  But have you ever had one of those weekends when you don't want to go outside?  That was me this weekend.  It was wonderful! ...Sleeping in, lazy breakfasts, lots of cooking, and a brand new stand mixer to play with.  It was the perfect winter weekend!   And being in my cozy, warm apartment all weekend made me crave ice cream.

In a New Years effort to be healthier, I thought: frozen yogurt.  I love greek yogurt, especially drizzled with honey, so wouldn't it be delicious to combine it into a frozen treat?  One problem: no ice cream machine. :-(

Well, after a little googling it turns out you can make ice cream at home without a machine... it just involves a little time.  Basically you make the ice cream (or yogurt) mixture, freeze it, then as it's freezing you break up the ice crystals in order to get a creamy consistency ... instead of a block of ice.  Pretty easy!  Take a look at David Lebovitz's detailed step-by-step instructions... they are very easy to follow.

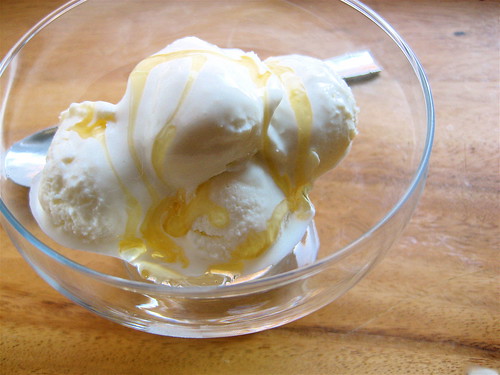
So I gave it a try.  I used Fage Greek Yogurt and my favorite local Clover Honey from the farmer's market.   It was sooooo delicious.  Incredibly creamy, tangy but sweet.... and you can still taste the honey!  This is going to be addictive. :-)

Enjoy!
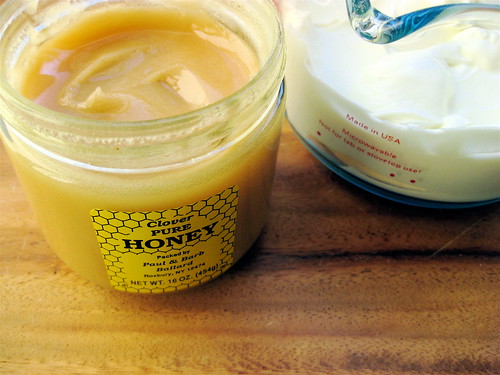


HONEY FROZEN YOGURT (adapted from David Lebovitz's recipe via 101 Cookbooks)
3 cups Greek Yogurt (whole milk or 2%, if using 2% strain the yogurt overnight, start w/6 cups)
1/3 cup Honey (more to taste)
1 tsp Vanilla Extract (optional)

If using an ice cream maker:
Combine all ingredients in ice cream maker bowl and freeze according to the machine's instructions

Without an ice cream machine:
Combine all ingredients in a mixing bowl.  Using the whip attachment if using a stand mixer or with a hand mixer, mix at medium speed until well combined and airy.  Pour mixture into a non-stick cake pan (I used a 9") and place in the freezer.  Resist the urge to eat it right away! :-)


After 30 minutes, remove the pan from the freezer. The outer mixture will have started to form ice crystals.  Using a hand blender, or a stand mixer, and whip the mixture for about a minute until combined.

Place back in the pan and in the freezer for another 30 minutes.  Repeat this freeze/whip process two more times.  Depending on your freezer you may need a fourth time, after which your ice cream will be ready!

Serve immediately with drizzled honey.  Yum!


Tuesday, December 15, 2009

Testing Recipes :: Rustic Berry Galettes


I have to admit I've been a very lazy blogger lately.  :-(  I thought the holidays would have me to the kitchen everyday baking batches and batches of cookies and giant feasts, but it's been just the opposite.  A. and I have been ordering an absurd amount of takeout, I haven't been to the farmer's market in weeks, and I hardly remember where it is that I store all of my kitchen contraptions.  It's actually quite sad now that I think about it.  ...I've just been so busy lately, with work, holiday get- togethers, and holiday shopping that it's sort of just happened; and I've missed it.

But, I'll stop complaining, and get cooking. :-)  

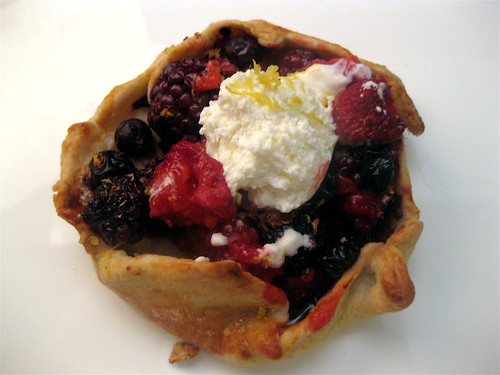
I decided to start testing ideas for a Christmas Eve dessert.  My parents will be making a delicious dinner, and I volunteered to make dessert.  I wanted something different, not too heavy, and individual sized.  So I thought: mini-galettes filled with berries!  Perfect! Don't they look like rustic little presents?  I topped them with a heaping spoonful of creme fraiche and lemon zest.  Who wouldn't be excited to get this on their plate at the end of a meal!

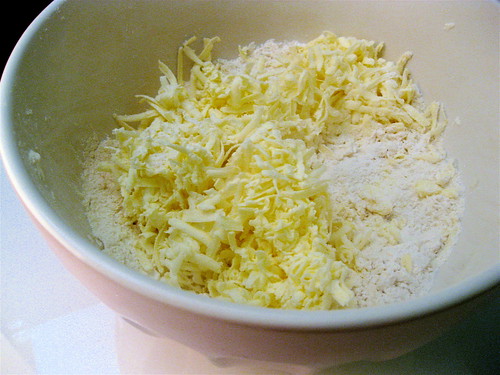
You can use fresh berries if you find them, or use up any frozen ones you have leftover from summer.  The dough  was much easier than i imagined.  It is a basic Pate Brisee french pie crust which I made without a food processor (since I only have a mini-prep) by grating the almost frozen butter.  I used the recipe from Joy of Baking ...and rather that re-explain the process, I'm posting the link since I think their instructions are perfect!

Enjoy!

MINI BERRY GALETTES  (inspired by Milk Eggs Chocolate)
1 batch Pate Brisee dough
3 cups of mixed berries
1 teaspoon Cinnamon
2 tablespoons brown sugar
1 cup cream cheese
4 tablespoons Powdered Sugar
1 teaspoon Vanilla
Lemon Zest and Creme Fraiche (or whipped cream) for garnish

Make the Pate Brisee dough.  *If you are not using a food processor incorporate the almost frozen butter into the flour by using a cheese grater to cut up the butter into small pieces.  Then quickly mix with your hands or a metal dough whisk if you have one.  Divide the dough into 8 pieces and store in the fridge in plastic wrap for 30 minutes.


Preheat the oven to 400F.  Season the fruit with the brown sugar and cinnamon in a mixing bowl.  In a separate bowl, whisk the cream cheese with the sugar and vanilla. 

For each tart, roll out a piece of dough to be about 6" in diameter.  Spread about 2 tablespoons of the cream cheese mixture in the center, making sure you leave 1" all around with no spread.  Top the center with a small mound of the berries (divide equally into 8 parts).  Crimp the edges of the dough over the fruit to create a crust.  


Continue to assemble the tarts.  Bake on a lightly floured baking sheet for 30 minutes or until the crust is golden and the fruit is bubbling.

To serve, top with a spoonful of cream and grate a bit of lemon zest over each tart. 


Sunday, November 8, 2009

Perfect Topping :: Stewed Berries w/Creme de Cassis


Sorry for the lack of posts this week, I've been feeling a bit under the weather. :-(  But I'm feeling much better and am back to the kitchen... and computer! :-)  

It's been so chilly here in NYC that I've been craving anything warm.  Even warm fruit!  Stewed fruits are delicious, it brings out all of the fruits sweetness.  You can stew berries or pit fruit with your favorite spices or liquors and use as a topping for anything from oatmeal to ice cream or cakes.  It's the perfect Fall treat!  And the perfect use for any frozen fruits you might have leftover from the summer... or fresh ripe berries.  

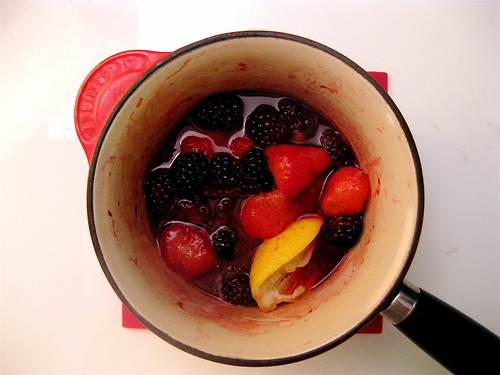
I used frozen strawberries and blueberries, and fresh blackberries; and spiced it with cinnamon, lemon and Creme de Cassis.  Creme de Cassis is a French blackcurrant liquor which is used to make the delicious and beautifully colored Kir Royale champagne cocktail.  It's perfect to have around for the holidays (look for a Creme de Cassis 'de Dijon'). 

These berries are perfectly sweet and tart, with a delicate syrup.  A.'s been topping vanilla ice cream with every night.  :-)  Yum!

Enjoy!

STEWED BERRIES with CREME de CASSIS
1 cup Blackberries (divided into 2)
1 cup Strawberries (divided into 2)
1/2 cup Blueberries
2 tablespoon Honey
1 Cinnamon Stick
1/3 cup water
Juice of half a lemon
2 teaspoons Creme de Cassis

In a heave saucepan over medium heat add half the blackberries and strawberries, the blueberries, honey, cinnamon stick, lemon juice and peel, and water and bring to a boil.  Lower heat, and continue to cook uncovered while stirring occasionally for 10 minutes.

The liquid will become a syrup.  Taste the syrup fro sweetness and add more honey or lemon juice to taste.  Add the Creme de Cassis and let it come to a boil again.

Remove from heat and add the remaining berries.  Enjoy warm over ice cream or cake, or store in the fridge and keep for a week.

Wednesday, September 30, 2009

In the Mail :: Brown Butter Lemon Pound Cake


My sister's birthday was yesterday!  To celebrate, I wanted to surprise her and send her a home baked birthday treat.  So this weekend, I did a little research on freezing and mailing desserts, and read that cakes rich in butter freeze and defrost perfectly.  So I thought: pound cake!  Perfect! Who doesn't love a rich, buttery loaf of cake? :-)

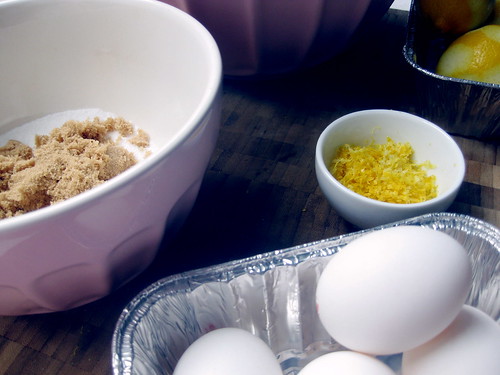
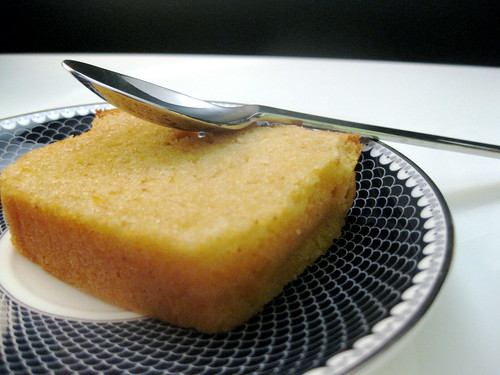
This month's Gourmet Magazine has a delicious recipe for a brown butter pound cake, and I of course, couldn't resist.  I ♥ brown butter! It's so simple, but it completely changes the flavor of the butter, it becomes deliciously nutty.  I also had a pile of lemons so it turned into a lemon zest brown butter pound cake.

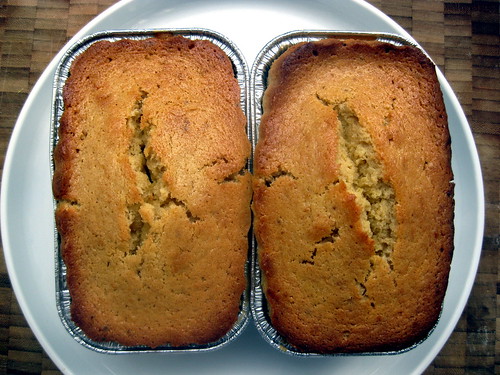
I made two loafs, one for A. and I to try, and one I froze and overnighted to my sister in Boston.   It arrived perfectly thawed and moist, ready to be cut and enjoyed, right on time for her b-day! 

Enjoy.

PS: Happy Birthday, N.! 


BROWN BUTTER LEMON POUND CAKED (adapted from Gourmet Magazine)
2 sticks of butter, unsalted
2 cups sifted flour
1 tsp baking powder
1/2 tsp salt
1/2 cup packed light brown sugar
1/2 cup granulated sugar
4 large eggs
1/2 tsp vanilla extract
zest of 2 lemons
juice of 1/2 a lemon

Preheat the oven to 325F and butter your loaf pan (or 2 mini loaf pans).  Heat the butter in a heavy saucepan until the solids on the bottom of the pan brown.  You want them to be a dark chocolate brown.  Transfer to a bowl and allow to cool in the fridge for 15 minutes.

Whisk together the flour, baking powder, and salt.  Beat together the brown butter and sugars until fluffy, about 2 minutes.  Add 1 egg at a time and continue to beat until fully mixed.  Add the vanilla, lemon juice and zest and mix at low speed.

Transfer the batter into the pans and rap on counter until the batter settles.  Bake until golden brown (between 1 - 1.5 hours) until a wooden pick comes out clean.

Allow the cake to cool in the pan for 30 minutes, then another hour out of the pan on a rack.

TO MAIL:  When the cake has cooled, wrap it in parchment paper and put the loaf in the freezer on a rack.  When the cake has frozen solid, about 2 hours, wrap it in aluminum foil or place in a freezer safe Tupperware (leave the parchment paper on).  When you are ready to mail, you can put the cake pan back in the loaf pan (this helps protect it in the mail) and re-wrap it in the paper and aluminum.  Place the loaf in a mailing box and fill any extra space with packing paper/peanuts to prevent movement and mail overnight.  

Thursday, July 30, 2009

I ♥ :: Brown Butter Plum Cake


I have to start be saying that I am truly in loooove with this recipe!  I ♥♥♥! Sugary plums, topped with a browned butter cake. 

I found it when googling plum recipes (reminder: I had 5 lbs of plums for this week's CSA share!) on Julie's blog, then saw it again on Patent & Pantry.  I love how recipes travel through books, friends, and blogs, and each person adds their own touch.

The pictures were so wonderful I couldn't resist and baked 2 cakes last night.  We only kept one, the second we shared with our neighbor who stopped by just as the pies had just come out of the oven...the whole apartment smelled sugary sweet! The effort of making one cake or pie is usually the same as baking 2...so if I have enough ingredients thats what I usually do... why not make and extra and share, take to work, or even freeze for later.

Instead of baking it in a pie pan, I baked it in a cast iron skillet...partly because I thought it would look nice served in the rustic skillet, partly because I don't own a pie pan :-)  Well it worked, the skillet method was perfect.

Here's the recipe. I hope you enjoy as much as I have.  I've enjoyed slices for breakfast, lunch, and dinner already. Next time I'll try baking it in individual ramekins for a dinner party or even a brunch.  It's so easy to make and a good use of fruits without having to undertake baking pie crust, and would go well with many different fruits (peaches, cherries, berries, or apples).

BROWN BUTTER PLUM CAKE (adapted from: Julie's blog)
8 large plums, or 20 small plums
3/4 cup sugar + 2 tbsp sugar (I used organic)
1/2 tsp cinnamon
1/2 tsp vanilla
1/2 tbsp lemon juice (I like the tartness this adds, but if you would prefer it to be more sweet, skip the lemons)
1 stick butter
1 cup flour
2 eggs

Preheat the oven to 350°F and butter a pie plate/skillet/ramekins.

Toss the sliced fruit with  2 Tbsp. sugar, cinnamon, vanilla, and lemon.  Spread into the plate or skillet. Melt the butter in a small saucepan and keep cooking it, stirring the pan occasionally, for about 5 minutes or until it turns golden. Pour into a bowl. Allow butter to cool for 5 minutes (you don't want the eggs to cook in the next step!)

Stir the 3/4 cup of sugar into the butter, then the eggs, then the flour. Pour mixture over the fruit and sprinkle a little bit of sugar.

Bake for 45 minutes, until golden and crusty, and the juices ooze from around the edges.  Serve hot with ice cream or let it cool and enjoy at room temperature (my favorite!).


PS: In this picture it looks like I'm sharing, that was the first slice. A.'s let me eat the rest all on my own, and he's been having leftover palmiers for dessert instead.  :-)

Tuesday, July 28, 2009

Sweet Tooth :: Palmiers


Palmiers have always been one of my favorite pastries.  Buttery, flaky and sweet - so perfectly simple.  

A few years ago a friend who was studying to be a chef showed me how to make them. I couldn't believe how easy it was! ...well unless you decide to make your own puff pastry dough, that's a different story. 

I wanted to bake them for a birthday breakfast at work.  I woke up 20 minutes earlier than usual,  and had warm palmiers ready to go.  

PALMIERS (Elephant ears)
1 sheet puff pastry (I usually buy Pepperidge Farm)
1/2 cup sugar
1 egg white

Preheat oven 425F. Defrost puff pastry sheet overnight in the fridge.  Unfold sheet and lighlty brush one side with a bit of the whipped egg white. You'll probably use a bit less than half an egg white, which is why I usually do 2 sheets at once.  Sprinkle sugar all over top side of the sheet on top of the egg white.  Make sure the sheet is evenly covered.

Start by folding/rolling the left side of the sheet onto itself towards the middle of the sheet. Repeat with the right side until it meets in the middle.  If your puff pastry dough has softened, place the roll in the freezer for 10 minutes before cutting. 

Cut roll into 1/4" - 1/2" slices.  Place palmiers on parchment paper and cook until a golden caramel color. About 15 minutes in the oven.  But keep your eye on them - the burn easily.  Cool and enjoy!


You can make different flavors by adding it before you roll the dough. Dust with cinamon, sprinkle chopped chocolate, or spread with jam. 

Related Posts with Thumbnails