Thursday, July 30, 2009

I ♥ :: Brown Butter Plum Cake


I have to start be saying that I am truly in loooove with this recipe!  I ♥♥♥! Sugary plums, topped with a browned butter cake. 

I found it when googling plum recipes (reminder: I had 5 lbs of plums for this week's CSA share!) on Julie's blog, then saw it again on Patent & Pantry.  I love how recipes travel through books, friends, and blogs, and each person adds their own touch.

The pictures were so wonderful I couldn't resist and baked 2 cakes last night.  We only kept one, the second we shared with our neighbor who stopped by just as the pies had just come out of the oven...the whole apartment smelled sugary sweet! The effort of making one cake or pie is usually the same as baking 2...so if I have enough ingredients thats what I usually do... why not make and extra and share, take to work, or even freeze for later.

Instead of baking it in a pie pan, I baked it in a cast iron skillet...partly because I thought it would look nice served in the rustic skillet, partly because I don't own a pie pan :-)  Well it worked, the skillet method was perfect.

Here's the recipe. I hope you enjoy as much as I have.  I've enjoyed slices for breakfast, lunch, and dinner already. Next time I'll try baking it in individual ramekins for a dinner party or even a brunch.  It's so easy to make and a good use of fruits without having to undertake baking pie crust, and would go well with many different fruits (peaches, cherries, berries, or apples).

BROWN BUTTER PLUM CAKE (adapted from: Julie's blog)
8 large plums, or 20 small plums
3/4 cup sugar + 2 tbsp sugar (I used organic)
1/2 tsp cinnamon
1/2 tsp vanilla
1/2 tbsp lemon juice (I like the tartness this adds, but if you would prefer it to be more sweet, skip the lemons)
1 stick butter
1 cup flour
2 eggs

Preheat the oven to 350°F and butter a pie plate/skillet/ramekins.

Toss the sliced fruit with  2 Tbsp. sugar, cinnamon, vanilla, and lemon.  Spread into the plate or skillet. Melt the butter in a small saucepan and keep cooking it, stirring the pan occasionally, for about 5 minutes or until it turns golden. Pour into a bowl. Allow butter to cool for 5 minutes (you don't want the eggs to cook in the next step!)

Stir the 3/4 cup of sugar into the butter, then the eggs, then the flour. Pour mixture over the fruit and sprinkle a little bit of sugar.

Bake for 45 minutes, until golden and crusty, and the juices ooze from around the edges.  Serve hot with ice cream or let it cool and enjoy at room temperature (my favorite!).


PS: In this picture it looks like I'm sharing, that was the first slice. A.'s let me eat the rest all on my own, and he's been having leftover palmiers for dessert instead.  :-)

Tuesday, July 28, 2009

Sweet Tooth :: Palmiers


Palmiers have always been one of my favorite pastries.  Buttery, flaky and sweet - so perfectly simple.  

A few years ago a friend who was studying to be a chef showed me how to make them. I couldn't believe how easy it was! ...well unless you decide to make your own puff pastry dough, that's a different story. 

I wanted to bake them for a birthday breakfast at work.  I woke up 20 minutes earlier than usual,  and had warm palmiers ready to go.  

PALMIERS (Elephant ears)
1 sheet puff pastry (I usually buy Pepperidge Farm)
1/2 cup sugar
1 egg white

Preheat oven 425F. Defrost puff pastry sheet overnight in the fridge.  Unfold sheet and lighlty brush one side with a bit of the whipped egg white. You'll probably use a bit less than half an egg white, which is why I usually do 2 sheets at once.  Sprinkle sugar all over top side of the sheet on top of the egg white.  Make sure the sheet is evenly covered.

Start by folding/rolling the left side of the sheet onto itself towards the middle of the sheet. Repeat with the right side until it meets in the middle.  If your puff pastry dough has softened, place the roll in the freezer for 10 minutes before cutting. 

Cut roll into 1/4" - 1/2" slices.  Place palmiers on parchment paper and cook until a golden caramel color. About 15 minutes in the oven.  But keep your eye on them - the burn easily.  Cool and enjoy!


You can make different flavors by adding it before you roll the dough. Dust with cinamon, sprinkle chopped chocolate, or spread with jam. 

Monday, July 27, 2009

From the Farm:: Our CSA


This weeks CSA share brought lots of goodies! ...I think it's the best week so far, fingers crossed for more sunny days!
2 lbs fava beans
1 lb string beans (various colors!)
Spring onions
3 lbs cucumbers
1 lb carrots
Bunch of parsley
5 lbs plus (yes - 5 lbs! pie recipes to come)
3 lbs peaches 
1 lb cooking greens (chard)
and milk

So every week I go and pick up our box of veggies, fruits, cheese, milk, and eggs!  One of the best parts of this is that you don't know what you are getting.  It sounds scary at first, but it forces you to experiment with new recipes and flavors.  My challenge this week: fava beans.  Any ideas?

I've gotten a few questions on what the CSA actually is and how it works.  Here are the basics:
CSA is Community Supported Agriculture which means that you are buying food directly from a local farm.  Every season local farms have a certain number of 'shares' (or memberships) that they sell in advance, in exchange you get a weekly delivery of seasonal vegetables. You can also purchase 'add ons' such as fruit, milk, cheese, yogurt, even chicken 'shares'.

It's a win-win situation for both farmers and consumers (ie: city dwellers like me whose only plot of land is little pot of basil growing by the window).  The farms have guaranteed business before the season begins which helps them with cash-flow, and we get local, seasonal, organic produce for a whole season. 

Produce is harvested at its peak and delivered straight to you  so you can't beat the flavors and freshness.

Here's our farm Norwich Meadows..doesn't it look charming? :-) I can't wait to go visit.

Click here for more info and to find a CSA in your area.

Sunday, July 26, 2009

Tea for Two:: Peach Iced Tea


I tried this on Friday when my friend E. stopped by for afternoon tea and cookies. I had peaches from our local farm share and thought they'd be perfect in iced tea! 

It was so refreshing that I made more today. I brewed it before A. and I went to the gym this afternoon, this was the perfect treat to have waiting at home! 

PEACH ICED TEA
brew 4 cups of tea (I like Kusmi English Breakfast)
add 1 peach cut into slices. 

Allow the tea to cool in fridge, and serve with lots of ice. I don't think it needs sugar, because the peaches are so sweet now.  The best part is eating the slices at the bottom of the glass.  Enjoy!


PS: In LOVE with my new Duralex Picardie glasses! They are the classic glassware of french cafes/bistros created in 1927. Read more about them here and here.  I found them at Chelsea Market this weekend.  Oh, and they are resistant! We already dropped one. Oops. But, it just bounced back, no scratches!  

Dinner for 4 :: Tilapia 'en Papillote' & Grilled Corn w/Cilantro Salt


Our good friends C. & D. are coming over for a summer dinner on the rooftop.   I'm making fillets of tilapia en papillote seasoned with ginger, lemon, and cilantro. 'En papillote' means cooked in paper.  Fish baked in the oven is perfect for a dinner party.  You can do the prep ahead of time, and simply place in the oven and plate when your guests arrive.  And the other perk: no fish smell in your apartment.

I'm pairing it with stove top grilled corns on the cob served with cilantro salt.  The husk stays on the corn and is tied back for presentation and easy eating.

For dessert, they brought a delicious three berry pie for The Little Pie Company.  It doesn't get more summer than that...fresh fish, corn on the cob, and berry pie! 

TILAPIA 'en PAPILLOTE'
4 -  8 oz. tilapia fillets (farm raised tilapia is environmentally friendly and sustainable)
4 tbsp minced ginger (I buy Minced Ginger from Whole Foods - so much easier!)
2 tbsp chopped cilantro
2 tbsp butter (@ room temperature)
1 tspn dijon mustard
Juice of 1 large lime
1 tomato
Salt and pepper
olive oil
Parchment paper

Season the tilapia fillets with 1/2 the ginger, cilantro, lemon juice, mustard, salt, pepper, and drizzle of olive oil (about a tablespoon).  Rub fillets with the ingredients and place back in the fridge for at least an hour.  


Now to create the little oven packages!  First cut four pieces of parchment paper 14" long. Fold each in half. Lay one sheet flat. Brush one half of the sheet (side facing up) with butter, and spread a bit of the minced ginger on top. Lay one filet of fish on top of the area with butter and ginger, place close to the middle fold.  Drizzle the fish with olive oil and a little pepper, and add a bit of the juice that was left from the seasoning.  Place slices of tomato on top of the fish. To close the packet, fold the second half of the parchment sheet over the fish.  Start folding the edges of the paper over itself to create a seal. Continue to close the packet creating a crescent shape (see picture).  Repeat for all filets. 


You can place in the preheated 350F oven immediatly or prepare ahead of time and leave assembled until ready to bake. If you are preparing ahead of time, place fish back in the fridge until ready to cook.  Cook for 25 minutes.  

Serve on a large tray and let each person open up their own. The steam will smell delicious and the fish will be perfectly moist! 


GRILLED CORN w/CILANTRO SALT (from Martha Stewart Living)
4 corn on the cob w/husks
2 tbsp kosher salt
1 tbsp finely chopped cilantro

Carefully pull back the husks on the corn.  Cut of a long piece of the husk, and with this tie back the husks with a small knot.  Heat your stove top griddle to medium high.  When hot, brush with olive oil to prevent sticking.  Place corns on the grill. Turn every few minutes so that they cook evenly.  It takes about 20 minutes for the corn to be cooked through.  (You can cut down on cook time by boiling corn prior to grilling).


Combine cilantro and salt in small bowl.  Serve with room temperature with plenty of butter.  :-)
Friday, July 24, 2009

Fresh from the Market:: Heirloom Tomato Pasta


Tomatoes have been showing up in my recipes the last couple of weeks, but I can't help it.  They are all over the farmer's markets, and deliciously sweet!  I came up with this recipe for a pound of heirloom tomatoes I picked up in Union Square last week.  

HEIRLOOM TOMATO PASTA
1 lb heirloom tomatoes (replace with cherry tomatoes if you can't find heirloom)
1 large carrot chopped (you also want it to be a paste - I put it in the food processor w/a little olive oil)
2-3 tbsp chopped up basil 
2 cloves of garlic
1/2 cup tomato juice
olive oil
salt and pepper to taste
1 box pasta of choice
Total time: 30 minutes max!

Start boiling water for pasta (don't add oil, only salt, it should taste like sea water).

Cut the tomatoes in half.  In a large skillet, medium heat, saute garlic with plenty of olive oil to cover the entire pan. Be careful and don't burn the garlic. As soon as it starts to brown, add tomatoes.  Move the pan around s that the tomatoes get covered in olive oil and garlic.  Salt a bit. Add Carrot paste, tomato juice, and basil.  Add salt and pepper to taste (note: don't be scared to try your food through each step...it's the only way to know how much to add).  Turn heat to low and allow to simmer while pasta cooks and gets drained. This wont take long, the total time for this sauce is between 15-20 minutes.  The idea is that the tomatoes still retain their shape.

Cook pasta till it's al-dente. You'll know because when you taste it it should still have a bite. Drain.  Add a little olive oil to pasta and move into a large boil.

Remove sauce from heat and mix the sauce into the pasta.  Add plenty of parmessan. 


oh PS: if you haven't read French Women Don't Get Fat, you should. Written by Mireille Guiliano, the CEO of Veuve Clicqout, it's a quirky, entertaining, fast read highlighting the importance of eating seasonally.  ...She also says its ok to have a chocolate croissant for breakfast... Something I might have to do today :-) Happy Friday!

Wednesday, July 22, 2009

I ♥ :: Milk & Cookies


A. (my husband) is playing soccer tonight, so I decided to surprise him with just-baked oatmeal raisin cookies ...well, and also treat myself to a cookie dough dinner!


I got this easy recipe from Joy of Baking.  

I used the same quantities, but instead of making large 1/4 cup cookies, I made smaller ones (1/8 cup ice cream scoop). I got 20 cookies in total.  Enough to enjoy some tonight, store the rest in a jar, and pack up a few in a box and take to work tomorrow!  (TIP: I  love these pastry paper boxes and always have some handy in the kitchen. I get them at Broadway Panhandler, they make all your home-baked goodies look like they came from a bakery!)


5 Days of Lunch :: Spanish Tortilla

We have dozens of farm-fresh, organic eggs from our CSA share this week!  

I love eggs... scrambled, hard-boiled, fried, soft-boiled, or baked.   Baked eggs (in a quiche or frittata) store nicely in the fridge and can be easily reheated the next day.  A veggie frittata or quiche stays fresh about 3 days.  So what better recipe to make for dinner, and have lunch the next day than the Spanish Tortilla. 

DAY 2: SPANISH TORTILLA
I'd never made a Spanish tortilla before... but figured it couldn't be all that different from a frittata (which I make all the time as a way to use up leftover veggies, meats or cheeses on a Sunday morning).  


8 eggs beaten (I like to limit the amount of yolks usually using a 1:2 ratio - but here I feel the yolks are necessary, so I used 6 of the yolks)
2 tbsp milk
2 red potatoes thinly sliced (finally! a chance to use my new mandolin)
1 large white onion
plenty of olive oil

I used these instructions from the NY Times and topped with sliced tomatoes, a little ricotta, and basil.  

We ate half the tortilla, and saved the rest for the next day. I paired mine with an heirloom tomato salad and took to work.  A. ate his slice for breakfast :-) ...it's actually got me thinking about making muffin-cup size frittatas and storing as a quick 'on the go' breakfast. 

Tuesday, July 21, 2009

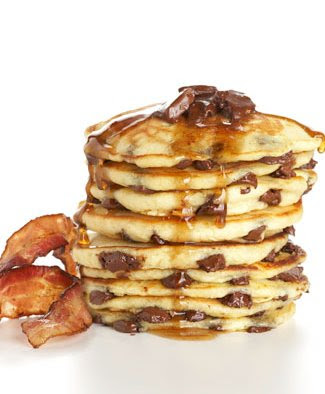
Crave :: Vosges Bacon Chocolate Chip Pancake Mix


It sounds a little weird at first...but think about it:  what's better with your Saturday morning diner chocolate chip pancakes than a side of bacon? Vosges just combined it all into one with this deliciously tempting pancake mix! 

It's their Mo's Bacon Bar (which is delicious! Imagine a smokey salty chocolate) with fluffy pancake mix.  

...Must go to Vosges Soho store and buy, will report back! 

Monday, July 20, 2009

5 days of Lunch :: Tomato & Cilantro Tuna Salad

Happy Monday!  Soooo... over the weekend I decided to extend my cooking to lunchtime (during the week lunchtime!). 
I try to cook with local, seasonal, organic ingredients as much as possible at home, but then I get to the office, lunch comes around and it all goes downhill.
 
I'm out to prove that packing lunch for work can be easy, more exciting than a peanut butter sandwich (although I do love a good PB&J!), and healthy.
 
It just requires a little planning ahead.  Here's the plan:
- Coming up with a different lunch dish every day
- Nothing that requires more than 5 minutes of prep time in the morning
- Include  fresh, seasonal ingedients in each meal


Day 1: TOMATO & CILATRO TUNA SALAD
8 oz can of Low Sodium Albacore Tuna in water
1/2 large tomato chopped
Roughly a tablespoon of cilatro leaves (a few sprigs)
Tablespoon of mayo (*if you don't like mayo, skip this step and add a bit more olive oil) 
Teaspoon of mustard
Juice of 1/2 a lime
Drizzle of olive oil
Salt and peper to taste
 
Combine all ingredients in a small bowl, and pack up! I paired with Carrs water crackers. 
 
TIP: Part of the hassle of taking lunch to work is: where do you put it? Getting good containers is key. I love Japanese bento boxes! The compartments are perfect for seprating your ingredients so that your not stuck with a mushy mess at noon. The one in the picture I picked up on a trip to Tokyo, but Amazon has a good selection.

Sunday, July 19, 2009

I ♥ :: Ed's Lobster Bar (Soho)

After  catching a late afternoon movie at the Angelika, we went to Ed's Lobster Bar in Soho for dinner.
A. (my husband) ordered the Sunday special: Clam Bake, I ordered the Lobster roll! 

Delicious... you cant beat lobster on a buttery roll with a side of fries ...oooh, and cherry pie a la mode for dessert! 


Tip:  Ed's Lobster Bar doesn't take reservations, but sit and eat at the bar and avoid the wait

Saturday, July 18, 2009

Dinner & a movie :: Tomato and Ricotta Flatbread

After a long week we decided to stay in on Friday night, make dinner, and watch a movie.   We got hooked on a marathon of HGTV house hunting shows and never got to the movie, but we did make dinner with some of my finds from the farmer's market earlier in the day. 

I had a few rounds of pizza dough and thought that a flatbread would be perfect base to top with fresh ricotta, and the ripe tomatoes!  Since my ingredients were so fresh I wanted to make sure to not overcook them so I baked the crust first, then added my toppings and lightly browned.  Everything but the dough was from this morning's market.

TIP: Pizza dough is great to have around, you can have it plain if you pop it in the oven brushed with olive oil, kosher salt, and pepper (imagine paired w/a rustic looking cheese board), or top with veggies/cheeses/meats for an easy dinner.  


Here's what I came up with, but experiment with your own ingredients ... I'm already thinking of what I can pair next time! :-)

FRESH TOMATO & RICOTTA FLATBREAD (for 2, with possibility of leftovers!)
2 rounds store bought pizza dough
2 large, ripe tomatoes (1/4" slices)
1 cup fresh ricotta
1 cup sliced crimini mushrooms
1/2 an onion
2 cloves garlic
1/4 cup chiffonades of basil (chiffonade: technique of cutting herbs into long strips)
Olive oil
Salt and Pepper
Sprinkling of Parmesan
Flour for rolling out the dough

1. Defrost pizza dough if frozen. I left mine out at room temperature before going to work and it was perfectly defrosted by the time I wanted to make dinner.  
2. Preheat oven to 425F. Lightly flour the surface where you are rolling out the dough (resist the urge and don't flip the dough, mid-air...believe me, I tried and ended up with a big mess...oops)
3. With a rolling pin (if you don't have one, use a large can or glass bottle) roll out the dough to about 12 inches. You can roll it round, but I find it easier to get a neat rectangular shape.
4. Lightly brush one side of the rolled dough with olive oil, and place this side face down on your baking sheet. Repeat for second round of dough.
5. Place in the oven for 10 minutes until lightly browned.
6. While dough is in the oven, in a skillet saute chopped onion and garlic until caramelized.  This will sweeten the taste. Remember to start browning onions, then add garlic after a couple minutes, garlic burns easily.  Season with salt and pepper. Remove from heat.
7. When dough is ready remove from the oven, and turn the crusts over, the side you brushed with olive oil will now be on top.
8. Start assembling your flatbreads! I start with the slices of tomato (which I've drizzled with olive oil and salt), and then the sliced mushrooms (also drizzled with olive oil before - to prevent drying out when you place in the oven). I then crumble the ricotta making sure there's cheese in every bite, then the basil, and sauteed onions and garlic.  I top with a light sprinkle of Parmesan.
9. Return to oven for another 5-8 minutes. 
10. Remove from oven and allow to rest for a minute or so. Slice and enjoy!

We ate most of it, but a small leftover slice was our breakfast this morning. I think next time I might make 3 just for the leftovers!

Friday, July 17, 2009

Summer Friday :: Union Sqaure Farmer's Market


I took a trip this afternoon to one of my favorite places in New York: the Union Square Farmer's Market!  The market is open year-round but Spring and Summer is when it's most bustling.  You'll find anything from vegetables and fruits, to local NY state wines, to preserves and pickles.

Most vendors are happy to let you sample their offerings which makes for an entertaining trip any day.  For me, it's a great way to cook with delicious seasonal ingredients.

Among my favorites today was the cheese from Dancing Ewe Farm . Their tuscan style, hand-crafted cheeses supply restaurants like Babbo and Daniel - yum! I also fell in love with their packaging, they wrapped my pecorino in brightly illustrated paper, with a black ribbon, and label (what a great hostess gift!).

I stocked up on fresh fruit, vegetables, herbs, and beautiful flowers for the weekend:
-Peaches (delicious...I couldn't resist and ate one on my walk home!)
-Heirloom tomatoes
-Basil and Cilantro 
-Pecorino from Dancing Ewe Farm 
-Fresh cow's milk ricotta from Dancing Ewe Farm
-Beef Jerkey
-Crimini mushrooms

Lots of cooking to come, stay tuned!

Monday, July 13, 2009

Dinner with a view: Lamb Kebabs


It's Monday night and I decided to make a lamb kebab picnic for two to take up to our rooftop and enjoy the breezy summer evening!  

I had ordered lamb kebab pieces from Fresh Direct (un-marinated, vacuum packed) and left them out to defrost in the morning.  I made Indian spice inspired kebabs, and paired with a simple lettuce (from this weeks CSA share!), feta, and cucumber salad; and a side of babaganoush with toasted pita bread slices.

It was delicious...and very simple! 

I placed everything on a large wooden tray (bamboo wood from whole foods) which made for easy cleanup.

LAMB KEBABS (adapted from Bon Appetit)
2 tablespoons olive oil
2 teaspoons vinegar
Juice of one Lime
2 large garlic clove, minced
3/4 teaspoon ground cumin
3/4 teaspoon ground coriander
1/2 teaspoon cayenne pepper
1/4 teaspoon salt
1 pound lamb shoulder, trimmed into 1-inch pieces (I used Lamb Kebab pieces from Fresh Direct)
4 bamboo skewers, soaked in water a few minutes
1 onion chopped into large 1 inch pieces

Mix all seasonings in a bowl and whisk.  Add lamb pieces and marinate for 30 minutes.Place pieces on bamboo skewers with slices of onions between chunks of lamb. Heat stovetop grill to medium-high (I love my red Le Creuset Griddle!). Brush lightly with olive oil.  

When heated, place the skewers on the griddle. Rotate every couple of minutes and cook to your desired taste... I choose medium. The lamb will continue to cook when you remove from the griddle and since we still needed to make our way to the roof and I didn't want to overcook.

For the salad: I roughly chopped the lettuce, added a few slices of feta cheese, and cucumbers. Seasoned with Olive Oil, salt and pepper.
Related Posts with Thumbnails