Sunday, October 18, 2009

For Starters :: Seared Local Scallops with Fresh Herb Aoli


After a delicious brunch... onto dinner! :-)  

We hadn't seen our friend's L. & D. in a while, and a friend of A.'s just moved to NYC.  So we invited them all over for dinner.  Aren't cold fall nights perfect for just staying in with friends and chatting for hours and hours over cheeses and wine, and a big dinner?  I think so... I wish we had a long farmhouse style rustic table and could have all of our friends over every Saturday until the weather warms up again.  Wouldn't that be wonderfully fun??? :-)

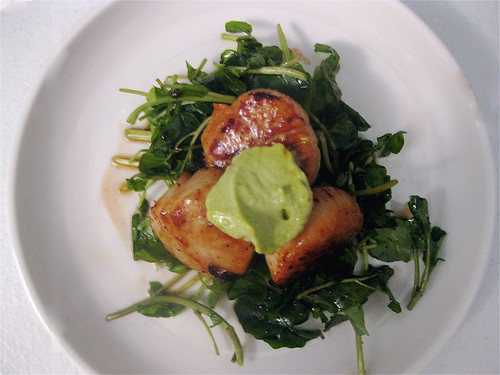
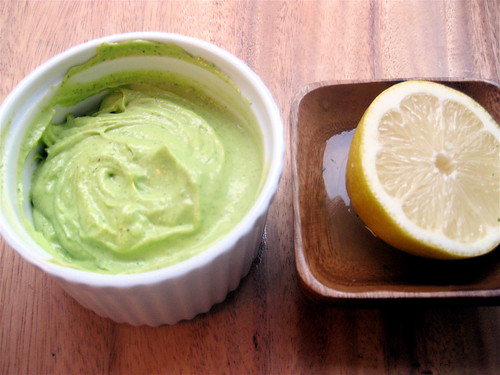
On the menu for dinner... first: the appetizer.  We had 2 pounds of local wild sea scallops and thought they'd make the perfect appetizer seared and served atop a bed of watercress.  For extra flavor, I made an aoli of basil and parsley... delicious!!!  

I have to say that making an aoli (or mayo!) is a pretty interesting process.  It's amazing how the slow streaming oil creams the egg yolks into a perfect custard.  It was my first time attempting this, and it was much easier than I imagined, and delicious atop fish or even as a dip for fresh veggies.  I think I must have called A. over about 10 times as I was processing the ingredients to show him the texture change... it's almost like magic! :-)

This recipe serves 6, but you can easily decrease it for a quick weeknight dinner for 2 or even one.  The herb aoli can be made a day beforehand and the scallops only take about 5 minutes to cook.   Enjoy!


SEARED SCALLOPS w/FRESH HERB AOLI (serves 6)
2 lbs Scallops (about 3 scallops/person)
Olive oil
1/2 tablespoon Herbes de Provence
Juice of 1 lemon
Salt & Pepper to taste
Slice of Bacon or Pancetta
Fresh Herb Aoli (recipe below)
Watercress Lettuce, or Frisee

Marinate the scallops with olive oil (about 3 tablespoons), lemon juice, herbs, and salt for 30 minutes in the fridge.
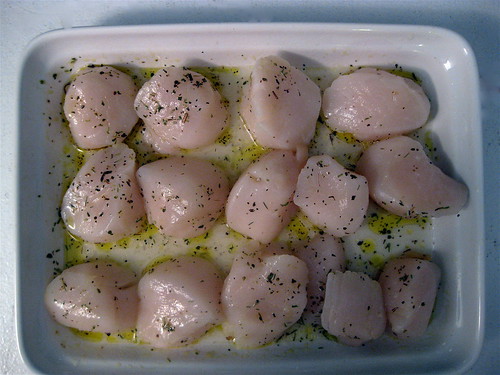


Heat a large non-stick skillet over high heat and add a bit of olive oil and the bacon.  Allow the bacon to cook and release its fat.  When the bacon starts to crisp, remove the strip from the pan and carefully add the scallops (which have been patted dry with a paper towel).  

Do not overcrowd the pan or the scallops will not sear, leave about 1" between each scallop.  You can do the searing in batches, but you don't want to do more than 2 batches since scallops should be served immediately after searing. Cook the scallops 2 minutes on each side until they get a light brown crust and are cooked in the middle.  If cut down the middle, you will see about 1/4" crust and a translucent center.

Plate the scallops atop a bunch of watercress (tossed with a bit of olive oil, salt and pepper) and add a dollop of the fresh herb aoli.

FRESH HERB AOLI
4 egg yolks
3 cloves garlic
1 tablespoon lemon juice
1 tablespoon basil
3 tablespoon parsley
3/4 cup olive oil

Add the eggs, lemon juice, and herbs to a food processor.  Pulse until the mixture becomes creamy and the herbs are finely chopped.  With the food processor on, add the olive oil a 1/4 teaspoon at a time until the mixture starts to thicken.  Slowly start to stream the olive oil into the processor.  


* My mini prep food processor does not have the option to add to it while it is turned on, so after chopping the eggs, lemon and herbs, I put the mixture in a bowl, and added the olive oil while mixing with an immersion blender... it worked just fine!  Just remember to add the oil slowly.

Saturday, October 17, 2009

Saturday Brunch :: Eggs en Cocotte & Roasted Sweet Potatoes


Hope you are enjoying the weekend!  I am getting ready for a busy day!  We are having friends over for both brunch and for dinner. Yes, twice in one day!  I can't wait... it's freezing here in NYC (40's in October!) so I can't imagine anything better than staying in and cooking.  :-)

So first: breakfast!

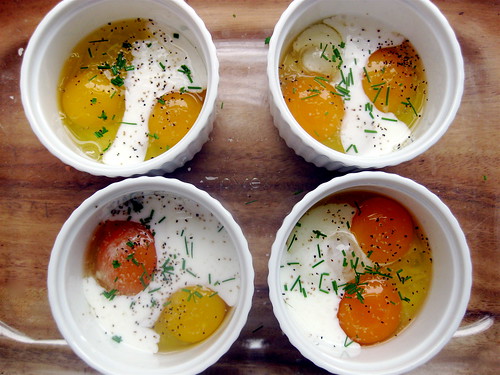
Our friend E. has her wonderful friend Simon visiting from London.  They stopped by for brunch on their way to the MOMA this morning.  With 3 dozen farm fresh eggs from our CSA last week, I decided to make Eggs 'en cocotte'.  This is a classic french dish where eggs are baked individually in ramekins in a 'bain marie'  in the oven until the white is no longer runny.  You can top them with cheese or veggies (whatever you think of!) and serve with toast for dipping.  I paired it with sweet and savoury rosemary roasted sweet potatoes.   What a yummy way to start the weekend... with friends and plenty of food!

Ok, so on the BRUNCH MENU:
- English Breakfast Tea (of course!)
- Scones with clotted cream and strawberry jam (I ♥ freezing scones... fresh scones whenever you crave them!)
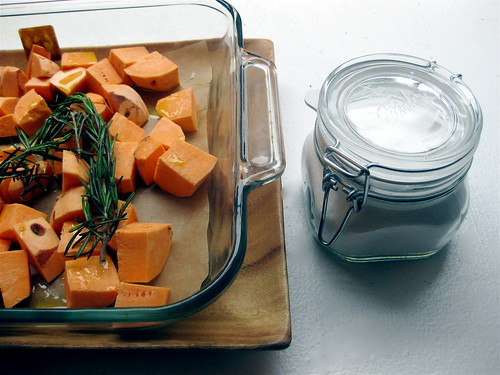
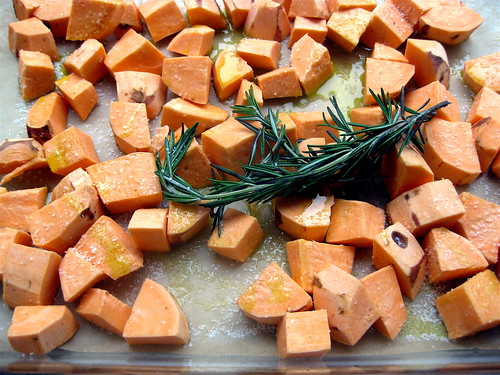
- Roasted Rosemary Sweet Potatoes
- Eggs 'en cocotte' with whole wheat bread toast
- Plenty of crispy Bacon

Oh ps:  I was, of course, very embarrassed to serve Simon my scones , but A. finally convinced me.  So into the oven they went:  Raisin and Lemon Zest scones with clotted cream.  Well, he seemed to really, genuinely enjoy them ... or at least was not completely offended with my attempt at this British classic, phew!  :-)  


EGGS EN COCOTTE (1 per person)
2 Eggs 
1 tablespoon buttermilk (or whole milk)
Sprinkling of cheese
Salt & Pepper
Fresh Chives, chopped
6-8 oz ramekins

Preheat the oven to 350F.  Butter the ramekins.  Sprinkle cheese into the ramekins (about a tablespoon).  Crack the eggs into the ramekin, being careful to keep the yolks whole.  Pour the milk on top of the eggs.  Do not mix.  Sprinkle with more cheese if desired, salt and pepper, and chives.

Place the ramekins in an oven dish.  Fill the dish with water, enough that it covers at least half the ramekin height.  Place in the oven and bake for 15-20 minutes, or until the eggs are cooked.  Serve with toast cut in strips for easy dipping!  


ROSEMARY ROASTED SWEET POTATOES
3 Sweet Potatoes, peeled and cut into 1/2" squares
2 springs of rosemary
Olive Oil
Kosher Salt
Pepper


Preheat oven to 400F.  Line a large baking dish with parchment paper (for easy clean up!).  Add the sweet potato pieces.  Sprinkle with olive oil, salt, and pepper and add the rosemary springs.  With your hands mix the potatoes to make sure they are all coated.  Don't worry if the rosemary starts to break.

Place in the oven and cook for 30 minutes or until the potatoes are tender.

Enjoy!

Tuesday, October 13, 2009

Craving Greens :: Orrechietti w/Sauteed Garlic Lime Spinach


A. had his weekly soccer game tonight and I didn't get home till late (long day at work!), so I was feeling very lazy.  ...but hungry! :-)   I was tempted to order pizza but, oddly enough,  I was craving greens.  Can you believe it... that you can actually crave healthy greens... not just things like cake and chocolate! ...Well, I guess that's a good thing!

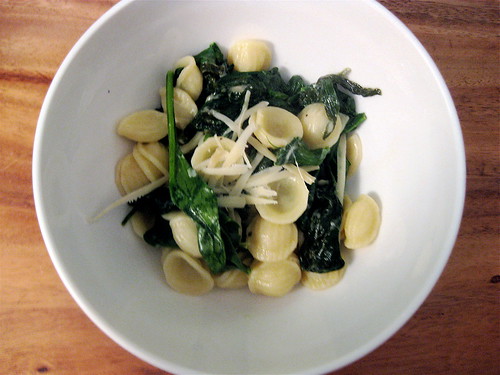
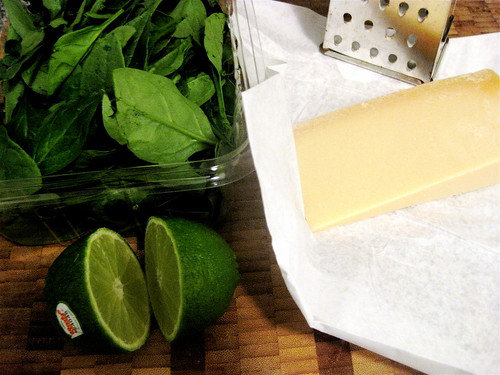
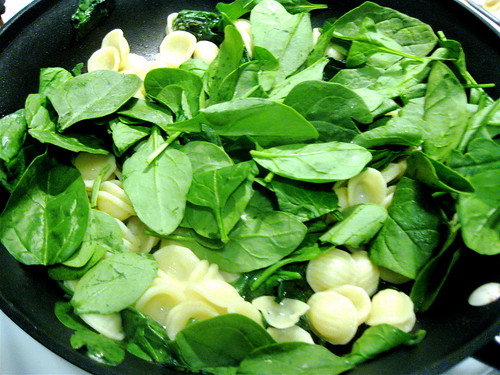
So I decided to follow my urge to be healthy and pulled out a bag of fresh baby clam spinach!  I came up with this very simple dish:  sauteed spinach in garlic and lime mixed with orrechietti, and topped with plenty of  freshly grated Parmesan.  

It only took a few minutes, and there was no chopping and hardly any cleanup.  It was so delicious and fresh that I think I'll be making this more often, no just lazy nights!  The bit of lime is perfect with the spinach and Parmesan.

* For a 'less healthy' version:  saute a bit of pancetta with the spinach and top w/toasted pine nuts. :-)

Enjoy!


ORRECHIETTI w/SAUTEED GARLIC LEMON SPINACH  (serves 2)
1/2 box Orrechietti
1 bag baby clam Spinach
2 cloves Garlic, peeled
Juice of 1/2 lime
Salt & Pepper to taste
Parmesan, grated
Extra Virgin Olive Oil

Boil the pasta per box directions. 

In a large skillet heat the olive oil (about a table spoon) and add whole garlic cloves.  When the garlic starts to brown, start adding the spinach.  It will wilt quickly, you can add the spinach in parts if it does not all fit at once.  Mix the spinach with the olive oil and add the lime juice and salt and pepper to taste.  This will only take a couple of minutes to cook.  

Add the pasta to the skillet and mix.  


Remove the garlic cloves, add the grated Parmesan and serve.

Sunday, October 11, 2009

Apple Season is Here :: Homemade Apple Sauce


Hope you had a lovely weekend!  A. and I have been very lazy and have hardly left the couch... we finally got Tivo installed and it has completely sucked us in!  I thought the idea was that you can record shows while you're not home, well it's had the opposite effect on us.  I did make it away from the TV for a few hours yesterday to do a little work in the kitchen.  I cleaned all the cabinets, the fridge, moved pots and pans around, threw out old spices, and even created a cabinet of Fido jars to house all of our dry goods - flours, sugars, salts, herbs, and oats all in their own jar.  I love it...a little Fall cleaning was much in order!


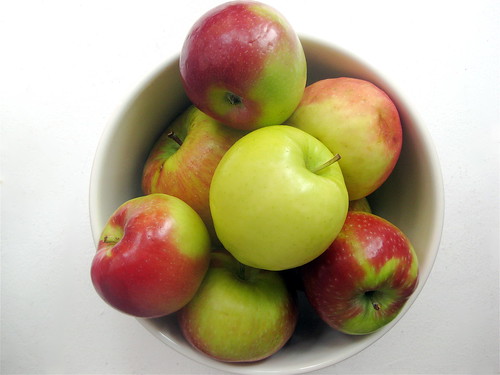
I realized I had a big bowl of apples from last week's farmer's market.   I decided they had to be used up before we go apple picking in a couple of weeks and come back with more piles.  Get ready for apple season:  tarts, pies, upside down cakes, and of course: apple sauce!  So I decided to make apple sauce, mostly because I love it (...a little weird but I actually buy Gerber's all the time as an after dinner dessert), but also because I bought an immersion blender last week that was begging to be used!  :-)

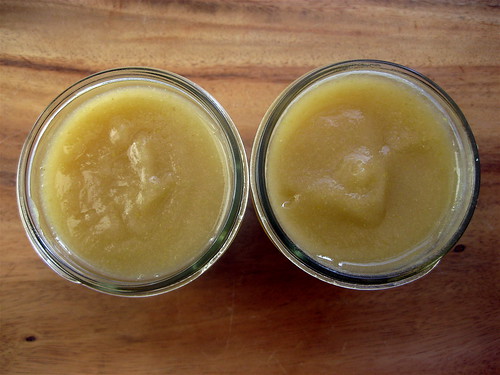
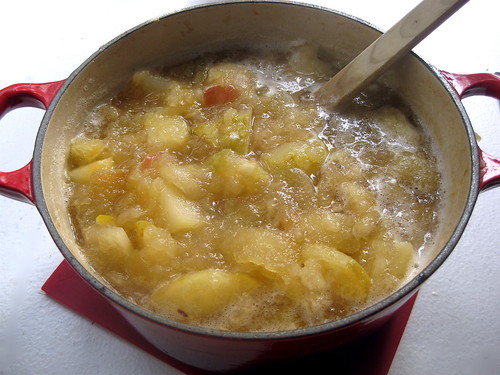
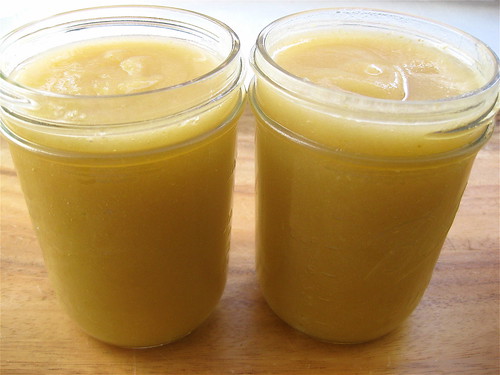
Well, it came out delicious, and so easy.  No need for store-bought.  I also had a few Bartlett Pears around, so I threw them in as well... why not!   I stored it in mason jars and into the fridge they went.  You can also freeze it for months.  It's a perfect snack or a topping for savoury meats.  Our neighbors - M. & G. - invited us over for dinner tonight to help them get through a turkey breast they are roasting, and A. had the idea that we could top it w/apple sauce.  Perfect, no need to make gravy!  So that's what we'll be having for dinner tonight, I can't wait: yum! 

Enjoy!

APPLE SAUCE (adapted from Simply Recipes)
6 large cooking apples (granny smith, macintosh, golden delicious, golden crisps, fuji, etc)
2 pears (optional)
Juice of one lemon
Zest of 1/2 a lemon
1 Cinnamon Stick
1/4 cup brown sugar
1/8 cup white sugar
1 cup water
1/2 teaspoon salt

Peel and quarter the apples and pears.  Put all ingredients in a large pot over high heat.  bring to a boil, and then cover and simmer on low heat for 25 minutes.


Remove from the heat and remove the cinnamon stick.  For a smooth texture, puree the mixture with a hand blender or use a potato masher for a chunkier consistency.

Enjoy warm, or allow to cool for later.  


IDEAS:  For a twist, add a star anise will boiling, or even a tip of ginger.  You can also add raisins, craisins, or blueberries to serve.

Thursday, October 8, 2009

Cleaning the Fridge :: Zucchini & Ham Fritatta


A.'s office is having a 'Healthy & Quick Weeknight Dinner' contest this week!  The winner's recipe gets served at the office cafeteria.  It may not sound like a big prize, but apparently sitting next to 'Freddy's Famous Jerk Chicken" is a big honor.  Oh, I can attest to the fame of Freddy's (the cafeteria chef) chicken ... A. counts the day's to Wednesday's chicken special!   So there's a lot of pressure!  :-) 


After much thought, I decided:  how about a quiche?  I love eggs and veggies for dinner, but the quiche crust is a bit to heavy for everyday eating.   So then I thought: crustless quiche!  By removing the crust, you are losing the fat and carbs and keeping the healthy eggs and veggies.  It's a delicious meal when served with a fresh tomato salad paired with a bit of fresh cheese.  You can use the whole egg, or use half yolks, half whites; and you can replace the vegetables with whatever you have handy... a perfect plate to clean out the fridge with.  Oh, and it stores well overnight.  What else could you ask for? :-)


I'll keep you posted on whether we win, enjoy!


FRESH ZUCCHINI & HAM FRITATTA

6 Eggs (or use 8 eggs - 4 whites, 4 whole eggs)

1 large zucchini

4 slices, turkey or ham - chopped

1/2 white onion, sliced

2 tablespoons skim milk

olive oil

salt & pepper


Preheat the oven to 350F.


In a non-stick skillet with a bit of olive oil, quickly saute the sliced zucchini, onions, and ham/turkey.  Continue to saute while stirring for a couple of minutes.  Remove from heat.


In a bowl mix the eggs and milk.  Season with salt and pepper to taste.


Pour the eggs into a  quiche pan (or 9" pie pan).  Add the vegetables and ham/meats.  Arrange the zucchini to make sure they are spread evenly through the pan.


Place in the oven (middle rack) for about 20 minutes, or until thoroughly cooked.  You will see the edges puff up and lightly brown.


Allow the eggs to cool for 5 minutes before you slice.


Serve with a side salad of chopped tomatoes with Olive oil, salt & pepper, chopped basil and a dollop of mascarpone (or goat cheese... even fresh yogurt of that's what you have handy) and enjoy!

Wednesday, October 7, 2009

In NYC :: Le Creuset Sale!

For all of you in NYC : Broadway Panhandler's annual sale starts today! Yippee... up to 75% off Le Creuset! I'm off to search for a 5 qt Dutch Oven.

I bought my first Le Creuset set a few years ago, and I loooove it. But I've quickly outgrown the 3 qt oven and am in need of a larger one, just in time for fall stews. The big question is: do I continue with my red theme and match my new pot to my old ones... or mix it up and get a new color? There are so many yummy colors to choose from! ...oh, decisions, decisions! What do you think?

Ok, wish me luck! ...If I find one, I'll be making Beouf Bourginon this weekend to celebrate!


*UPDATE: I found it!!! 50% off! ... chose a 7qt oval oven (instead of a 5qt round) and it's Carribean blue! I love it, I can't stop staring at it. Isn't it beautiful??? Only problem is now I think I need another one in a white or dune color to bring it all together: red, aqua, and white! :-)

Monday, October 5, 2009

Travel Stories :: Chicken Tagine w/Preserved Limes


Our friend E. just got back from an amazing trip to London and Paris!  She came over for dinner to tell us all about her adventures.  Don't you ♥ hearing travel stories?  I do! It makes me want to hop on a plane immediately!  I secretly wish people still have get togethers to look at travel pictures instead of just posting them online.  :-)

Anyway.... in the spirit of far-off travels, for dinner, I decided to make something I've been daydreaming of for a while: a chicken tagine!  I had seen a wonderful recipe by Sunday Suppers a while back and was especially excited because it's the perfect plate for the preserved limes  I had in the fridge.

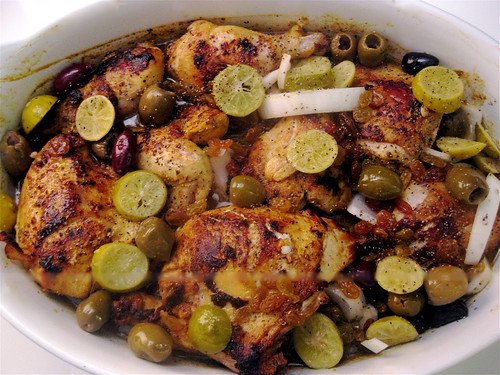
Since I don't have a proper tagine pot (on my wishlist... and after this experiment it has quickly risen to #1 on that list!), I made it in an oven baking dish.  While the presentation might not be as dramatic, the flavor was as delicious as I imagined, and much easier than I had thought!  The seasoned chicken is perfection with the sweet raisins and tangy limes and olives.  It's amazing how soft the limes/lemons become when preserved.  

I paired the tagine with a simple almond rice (by simple I mean I just toasted 1/2 cup almonds, 2 cloves garlic with 2 cups rice before adding the water).  It was so delicious, I couldn't bring myself to throw away the leftover tagine sauce. I froze it... I think it would be delicious over couscous!

Enjoy!


CHICKEN TAGINE (adapted from Sunday Suppers)
1 whole chicken, cut
1 tsp turmeric, cinnamon, cumin, dried cilantro, and coriander
1/3 cup olive oil
1/3 cup lemon/lime juice
1/2 cup preserved lemon/limes
1/2 cup olives, pitted
1 white onion, slices
1/2 golden raisins
2 cups chicken stock

Preheat the oven to 350F.  Mix the  olive oil, lime juice, and spices and season the chicken.  Let the chicken marinate for 1 hour in the refrigerator.

On high heat in a non-stick skillet with bit of olive oil, sear the chicken.  Make sure you sear all sides.  This will take about 15 minutes.  You want a nice golden brown color.

Place the seared chicken in the tagine or baking dish (covered with foil) along with the raisins, olives, onion, preserved limes, and chicken stock.  Place in the oven and cook for 45 minutes or until chicken is done.


Related Posts with Thumbnails